Easy Moen 7065 Faucet Repair Methods at Home!
Leaking or hot water flowing when wandering the handle on the cold side is the worst nightmare for one who has to do the dishes.
The Moen 7065 faucet repair is easy and takes 10 – 15 minutes. Mainly, it occurs when the O-ring, seal/gasket, or plastic parts are torn. To repair it, you need to replace them.
To do the fixing stuff of your faucet, I’ll help you with that by presenting the in-depth step-by-step procedure. Here I Go!
3 Methods for Moen 7065 Faucet Repair!
If your Moen 7065 faucet repair parts are showing some sort of issue, then it’s high time to fix them after locating the causes. To fix the most common issues, here’s what you need to do:
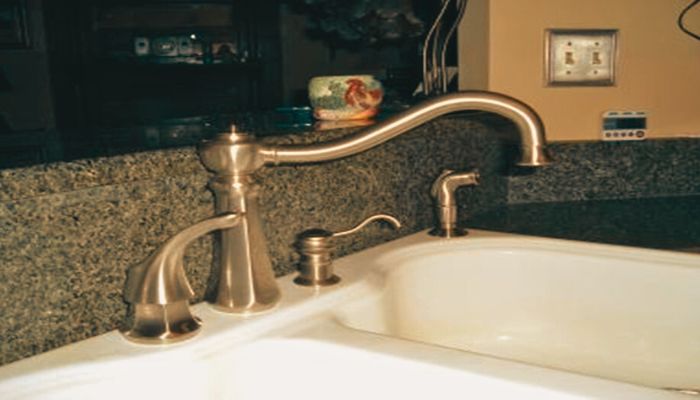
1. Leaking Between Spout and Handle
Water coming in the middle of the spout and handle is a huge issue that occurs when the O-ring on the cartridge or spout is broken or damaged. The black O-ring provides protection and stops water from leaking by granting a strong seal.
Troubleshooting Steps
Step 1: Detach Quick Connect Hose
Start by turning off the water supply in the kitchen. Beneath the spout, you’ll see the quick connect hose fitted onto the spout body. Then, unplug it using a suitable tool like a wrench.
Step 2: Remove The Spout Mounting Nut, Washer, and Support Bracket
Take out the spout mounting nut and mounting washer. You’ll also need to remove the support bracket.
Step 3: Unfasten The Spout Body and O-ring
After that, take out the spout body and locate the O-ring (that sits at the end of the spout frame). Remove that and clean the bottom of the spout body.
Step 4: Put On The O-ring
Install the new O-ring and place it properly. Add a little petroleum-based lubricant to the O-ring to keep it secure and damage-free for a long time.
Step 5: Insert All The Parts On The Right Spot
Put the spout body inside the sinkhole and secure it with the support bracket, mounting washer, and nut. Be sure to tighten out the nut. Place all the parts in the right spot by doing the opposite of removal. Turn on the water supply and test it out.
Step 6: If Not Working, Then Do This
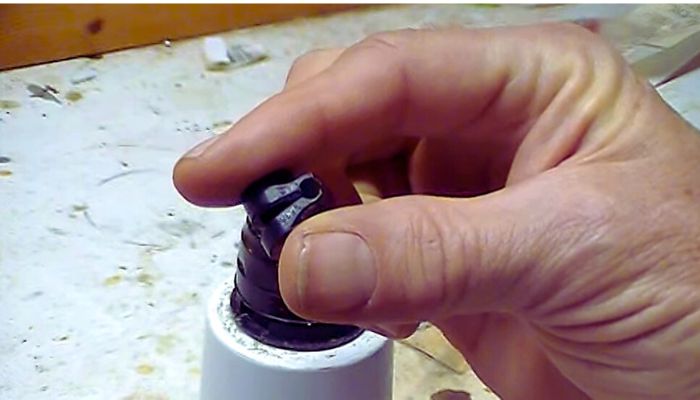
Remove the upper chrome shell of the handle using a small L-shaped wrench. Next, detach the bottom chrome shell from the handle to find the inner mechanisms. Just twist the bottom section and it’ll come out.
Take a screwdriver and remove the screw in the midsection. Be sure to remove the small black plastic part too. Remove the handle adapter and connector.
Pull out the gasket and take out the black O-ring using a wrench. Be sure to twist it strongly in the anticlockwise direction to remove the black O-ring. Then, insert the new O-ring in the right spot. Reinstall all the parts by doing the opposite steps.
Note: If still leaking between the spout and handle, then you have to change the cartridge inside the handle.
2. Dipping at the Bottom of the Spout
The Moen faucet 7065 sometimes dips at the end of the spout when the rubber seal or gasket is scratched or spoiled badly. This part secures ideal sealing inside the spout and stops the chances of leaking at the bottom.
Troubleshooting Steps
3. Flowing Hot to Cold at Different Positions
A lot of times, the 7065 faucet of Moen fails to provide the cold or hot water supply when rotating the lever in the correct positions. This usually occurs due to the diverter’s black plastic part which falls and causes the wandering in hot to cold water at different sides.
Troubleshooting Steps
Extra Tip: Just like the repair diagram of Moen 7400, you can look into the illustration of parts given in the installation manual of Moen 7065 to understand the whole procedure better.
Wrapping Up
That’s how you can do the Moen 7065 faucet repair! By and large, the cost for the O-ring, rubber seal/gasket, and the black plastic part will be around $20 – $30 only.
Instead of spending hundreds of bucks on repairs from the auto shop, it’s wise to do it yourself when the fixing method seems simple and explained.
You will require a few gears like a screwdriver, wrench, and so on but the process is similar to repairing Moen 6410 faucet. So, don’t wait longer and Go For It!

![How to Find Moen Faucet Model Number? [Explained]](https://faucetfam.com/wp-content/uploads/2023/02/how-to-find-Moen-faucet-model-number-768x432.jpg)
![Moen Touchless Kitchen Faucet Not Working [Causes and Fixes]](https://faucetfam.com/wp-content/uploads/2023/02/Moen-Touchless-Kitchen-Faucet-Not-Working-768x432.jpg)