
Moen 7400 Kitchen Faucet Repair Diagram!
From a leaking Moen faucet to a stuck handle that won’t budge, you may experience different types of issues with this classic faucet choice from the famous brand. However, troubleshooting the issue is a great place to start. Especially if you are dealing with the Moen 7400 kitchen faucet.
I’m here to help simplify the process for you. In this guide, I have included a Moen 7400 kitchen faucet repair diagram and solutions to some of the most common issues that arise with this classic faucet choice from the renowned brand.
With my guidance, you’ll learn how to fix unnatural water flow, leaks, and improper temperature control. So, let’s dive in without waiting!
Key Takeaways
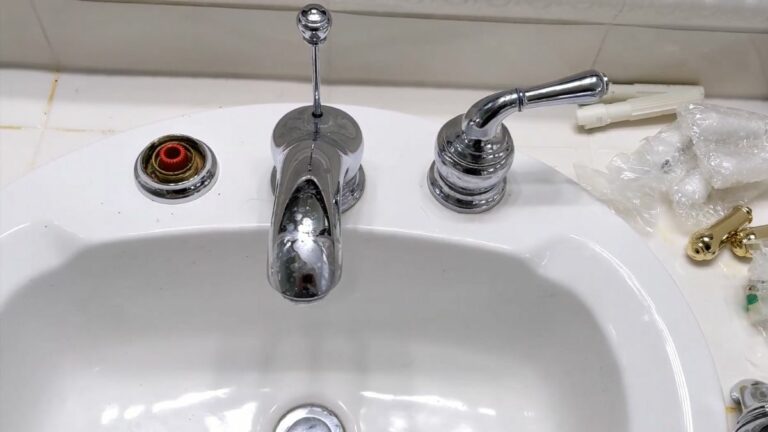
The Moen 7400 Kitchen Faucet Repair Diagram
Before trying any repair at all, you must find the parts properly. And for that, here is the Moen single-handle kitchen faucet parts diagram directly taken from the manual for the 7400 series. Also, there is something you must know regarding how to disassemble a faucet from Moen.
To disassemble a faucet, make sure you are referring to the faucet diagram and taking the components out in a specific order. Similarly when putting it back, reassembling in reverse order is mentioned.

Moen 7400 Kitchen Faucet Repair for Unusual Water Flow
An unusual change to the water flow or pressure in Moen’s kitchen faucet means there is something wrong with either the supply line or the aerator. It can also happen from not entirely open water valves.
Sometimes debris in cartridges can also result in problematic flow. Some new faucets do come with design elements meant to reduce water use.
The most working solution to this lies in the aerator.
Try this:
Moen 7400 Kitchen Faucet Repair For Leaking Spout Hub
This is also a common Moen 7400 kitchen faucet problem. And it happens due to a worn-out O-ring or rubber seal. It can also be completely torn or scratched. In all cases, the seat is not able to do its job inside the spout. Hence there is a leak.
To fix this issue you will need to change the O-rings that are inside the spout. It usually has a number depending on the faucet model.
You can get a Moen 7400 kitchen faucet repair kit to resolve the issue. For this model, the Moen 96778 Spout O-Ring Kit is the one to try. You simply need to use the replacement spout seal kit and there should be instructions provided that you can follow.
Make sure to clean the inside of the spout and outside of the valve body, during the replacement. After you are done don’t forget to lubricate as well. You can use silicone-based grease for that. The suggested Moen 7400 O-ring kit comes with one.
Some people go for plumber’s grade faucet grease or regular silicone spray, which is absolutely disallowed. You also cannot use any lubricant that has petroleum. It will react with the rubber seals and the spout will not work properly.
Moen 7400 Kitchen Faucet Repair for Continuous Leaks or Malfunctioning Temperature Control
You may notice that the Moen kitchen faucet is leaking continuously at different spots. Or you are not able to control the temperature of water due to some malfunction. There can also be water pressure reduction in your Moen.
Well, the number one culprit for all these issues is a damaged cartridge. I have discussed accessing and cleaning a cartridge for repairing Moen faucets before.
Here, let me break down replacing the Moen 7400 faucet cartridge, which is the 1225 cartridge. You will also need a slot screwdriver and an Allen wrench. Some thread lubricant and slip-lock pliers will also be necessary.
As you are already doing a Moen 7400 faucet removal, consider checking the valve seat and also the rubber seals that surround it. Replace the seals if those are too damaged.
Wrapping Up
Dealing with a faulty Moen 7400 kitchen faucet can be stressful, but with the right guidance, it is possible to repair the faucet on your own.
By using the Moen 7400 kitchen faucet repair diagram, you can find the parts correctly and troubleshoot common issues that may arise, such as unnatural water flow, leaks, and improper temperature control.
You can use the recommended tools and kits to avoid any damage. However, sometimes, it’s just not as easy as it may seem. And if you are stuck in such a difficult situation, it might be time to get the faucet inspected by an expert.
I will see you again in my next guide, bye!

![Moen Sensor Faucet Troubleshooting [A Complete Guide]](https://faucetfam.com/wp-content/uploads/2023/02/Moen-sensor-faucet-troubleshooting-768x432.jpg)
![Where are Moen Faucets Made? [Uncovering the Origins]](https://faucetfam.com/wp-content/uploads/2022/12/Where-Are-Moen-Faucets-Made-768x432.jpg)

![How to Find Moen Faucet Model Number? [Explained]](https://faucetfam.com/wp-content/uploads/2023/02/how-to-find-Moen-faucet-model-number-768x432.jpg)