How To Fix A Leaking Shower Faucet Stem Quickly
Needless to say, a leaking faucet is not only costly but also really annoying. And in general, the faucet stem is the one to blame. But the good news is that it’s easy to learn how to fix a leaking shower faucet stem.
You should first remove the handle cap and the handle. Work with the locking clip and remove the cartridge. After removing the shower valve stem, you need to inspect it. If it appears to be damaged, get it replaced.
But what if it is not damaged? What explains the leak, and what should you do in such scenarios? Well, you will learn everything about the topic by continuing to read.
Why Is My Shower Stem Leaking?
So, there can be multiple reasons why the shower stem might be leaking. First, the washers or seals in the valve assembly might have been worn out. Secondly, the base of the valve stem has washers, which can also get damaged over time.
The contraption fails to maintain a proper seal for both cases revolving around the washers or o-rings. That eventually makes the water seep out from the handle. No matter how much you tighten it, there will be leaks.
Finally, the valve itself can get worn out. And generally, as hinted earlier, the faucet stem is why you face shower faucet leaks.
What to Do When the Shower Stem Is Leaking
Whether you are repairing a leaky Delta shower faucet or a faucet from another brand, the steps are generally the same. These steps should work for most shower faucets –
1. Gather the required tools
So, to troubleshoot a leaking shower stem, you will mainly need three tools. They are –
Regarding replacement parts, you will need washers or O-rings and a replacement faucet stem cartridge.
2. Turn the water supply valve off
You should close the main water supply valve. It will prevent you from getting drenched. Also, it’s a good idea to plug the drain. You can just use a towel to block it. Wondering why is it important?
Well, you will need to handle a lot of small parts when working with the shower faucet. And if you drop one into the drain, it will be gone forever.
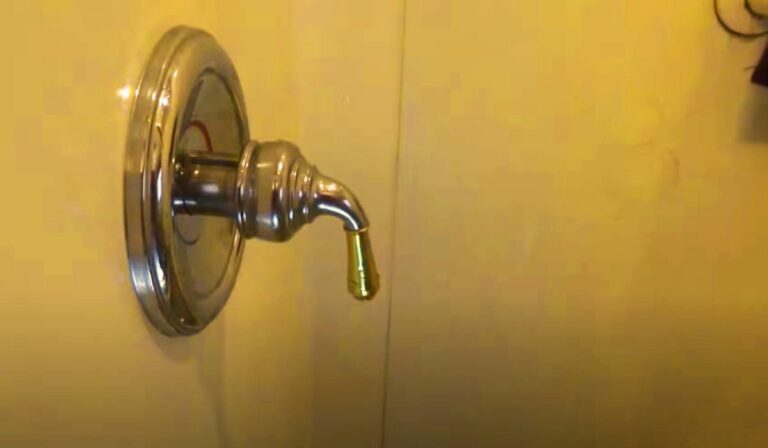
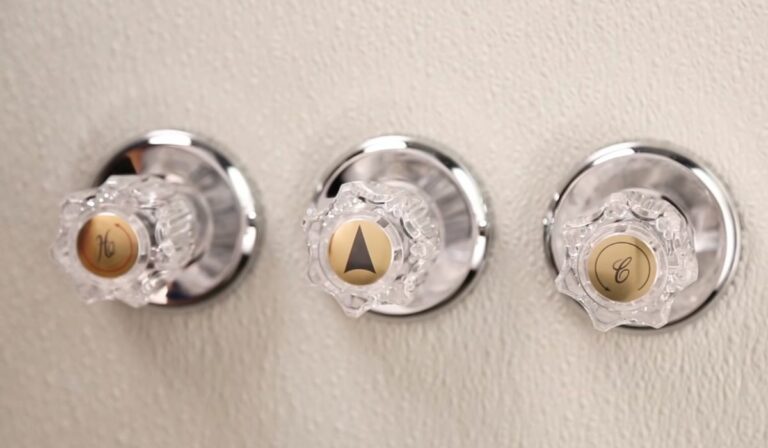
3. Remove the handle
With the water supply valve turned off, it would be time to get the handle off. To do so, remove the protective cap by using a flat-head screwdriver or anything sharp.
Once that’s removed, you will either see a screw or a nut. Unscrew it but rotate it counterclockwise with a wrench or a screwdriver. The handle should come right off.
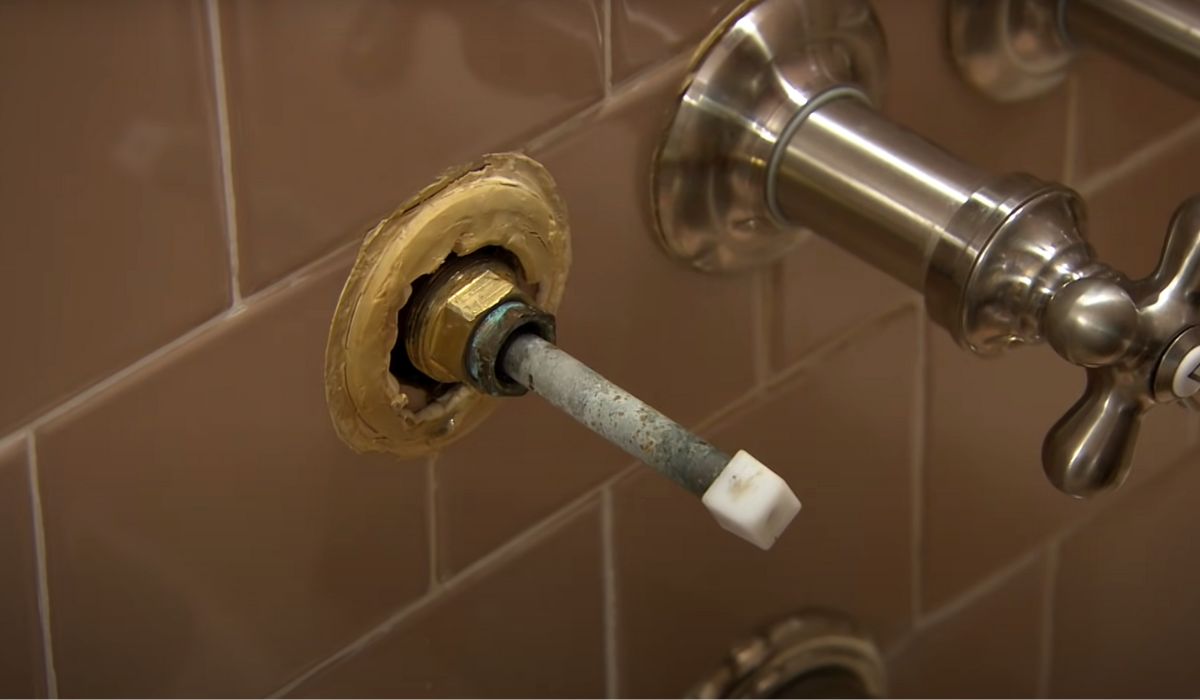
4. Remove the locking clip and take the valve off
Your shower valve may have a locking clip. If so, you will see it right on the top of the valve. To pull it out, you will need pliers. Finding it hard to grab the locking clip? You can pry it off with the flat-head screwdriver.
With the locking clip off, you should be able to get the valve out. To grab it, use a wrench. But make sure not to force it. A gentle pull should be good enough. However, if it appears to be stuck, spray some WD-40 into it.
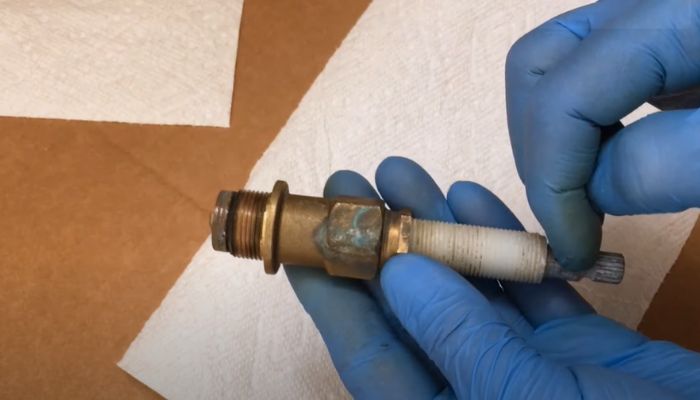
5. Check the condition of the washers and replace them if required
Now that the valve is out, thoroughly check the O-rings. Do they appear to be damaged or broken? In that case, you do not need to purchase a new valve. Just replacing the worn-out O-rings should do the trick.
6. Inspect the valve and replace it
If the washers or O-rings appear in good shape, the valve might be the reason behind the leak. Here, you need to install a brand-new unit into place. Make sure that the washers are placed correctly too.
Can a Faucet Stem Be Repaired?
Generally, leaks around the faucet stem can only be repaired with a stem replacement or by replacing the washers or O-rings. That is, you can not fix the worn-out faucet stem.
On average, getting a replacement unit can take anywhere from $100 to $250. And as you know by now, it’s easy to install a new faucet cartridge.
How Can I Test for Leaks?
Whether replacing a two-handle shower valve or a single-handle valve, there’s no denying that the process is a little time-consuming. So, it’s a good idea to confirm whether there’s a leak.
But how can you do that? Choose one of the methods mentioned below –
1. Keep a dry paper towel under the faucet
You can easily check for leaks using a paper towel. Leave it for a while and then see whether it is wet. If so, there’s a leak!
2. Put a small pot underneath
You can place a small pot or cup right under the faucet. Keep it in position for a few hours and check whether any water is inside. Found some? You are dealing with a leak.
3. Look for visible signs of water damage
If you do not want to wait just to confirm a leak, you can inspect the shower faucet area. Are there any visible water damage marks? If found, you can conclude that there’s a leakage problem.
Final Words
See? It’s not that hard to learn how to fix a leaking shower faucet stem. And if you do not need to replace the valve, the repair cost will be extremely low. To be exact, a pack of washers or O-rings should be around $6.
But you should get it checked by a professional plumber if the leak persists even after replacing the O-rings and the stem. There can be an issue with the shower, which might be causing it to leak.

![How To Remove Tub Spout Without Set Screw? [Step-by-step Guide]](https://faucetfam.com/wp-content/uploads/2023/06/How-To-Remove-Tub-Spout-Without-Set-Screw-768x448.jpeg)