Replacing RV Shower Faucet Without Access Panel
Whether you are refurbishing your RV or on the road, the shower faucet should ensure a refreshing bathing experience. However, the newer models often come with a hidden access panel, making faucet replacement a challenge.
Thankfully, replacing rv shower faucet without access panel is not an impossible task either.
Some RV shower faucets offer integrated designs into the walls without access panels. But there are inventive steps to make it possible. Start by gathering the necessary tools and shutting off the water supply. Once you remove the valve, the main work begins.
So, let me delve into the details and show you how to tackle this project.
Replacing RV Shower Faucet without Access Panel
You can certainly replace the shower faucet without an access panel in an RV. It will be a complicated journey, but totally worth the extra effort.
First, here is what you need to gather:
Next come the general instructions to guide you through the process smoothly:
1. Shut Off the Water Supply
Always begin any plumbing repair by turning off the main water supply. Since an RV is a vehicle, it might need different maneuvering.
So, locate those hot and cold water shut-off valves for your shower and shut them off. Generally, turning them clockwise should do the trick.
2. Remove Shower Handle
Place a towel or a cloth over the tub drain so no small components get lost in the pipelines.
Now, inspect shower handles for a tiny hole or a cap. Since there are many faucet handle designs, that hidden screw can be set anywhere.
But I suggest searching underneath the handle caps that are usually on top. If the handles are levers, check sideways.
Once you find it, pry open the cap to discover a handle-securing screw. Use a screwdriver or an Allen wrench (depending on the screw type) to remove it. Then gently pull off the handle.
3. Remove the Decorative Plate
Most shower faucet sets have a decorative cover at the base or around the valve. Some models have securing screws or snap-on clips to hold them.
Examine the work and slowly remove the screws or pry off the plate. This will expose the valve assembly.
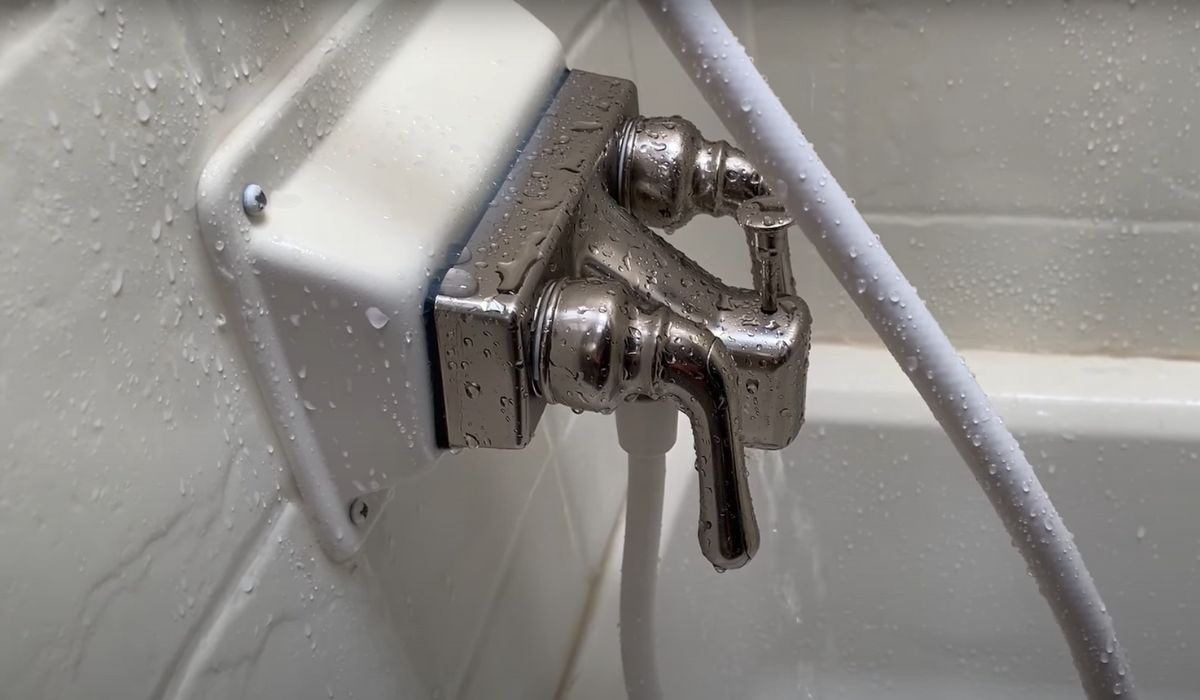
4. Disconnect the Water Lines
With the help of an adjustable wrench, carefully disconnect the water lines from the valve assembly. Loosen the components either by pulling or unfastening; it depends on the design.
Also, expect some water spills or drips during this process. The towel on the tub floor will come in handy here.
5. Cut into the Wall (If Required)
Ignore this step and move straight to the next step if you can access removing the old faucet directly.
Nevertheless, some older faucet units stay permanently secured to the RV’s shower wall, making it difficult to reach the pipes behind them.
In that case, you may have to cut out the wall around the faucet edges to dislodge it completely. Use a box cutter to cut into the board carefully. Try to imagine the new faucet’s plate dimensions at this stage.
It will prevent cutting wider or deeper than what may seem visible after the final installation.
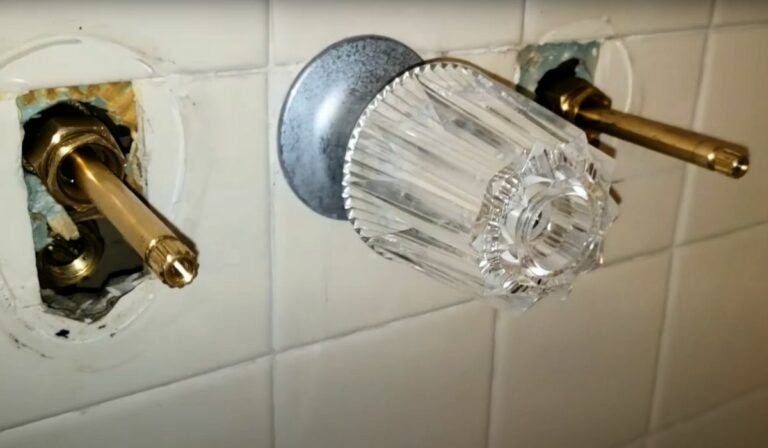
6. Remove Old Faucet
Most faucets will have mounting screws or nuts securing them to the wall or the pipelines behind them. Simply remove these fasteners to detach the old faucet.
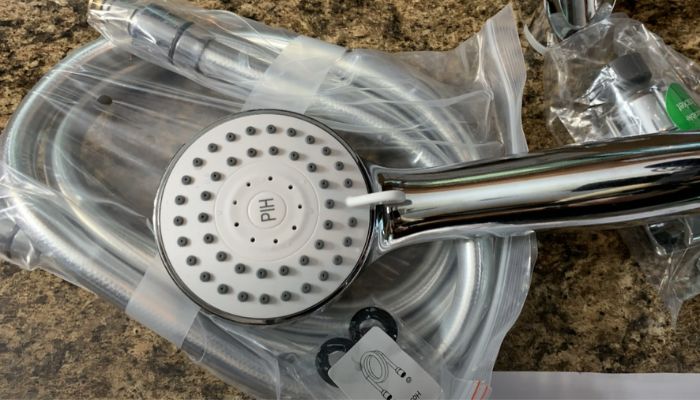
7. Install the New Faucet
Now you will follow the reverse method of every unfastening step you took earlier. Install the new faucet by aligning it with the existing hole.
Use the mounting nuts or screws to secure it in place. Do not overtighten anything, as it can damage the fixture.
8. Reconnect Water Lines
At the same time, reconnect the RV plumbing’s water line to the new faucet’s back. Ignore this step if it was already done while attaching the mounting components.
9. Reattach the Decorative Plate and Handle
By reversing the removal steps given earlier, you can reinstall the decorative plate and the handle. Make sure no part is left behind.
10. Turn On Water Supply and Test
Slowly turn on the main water shut-off valves and check for leaks around the new installation. Test the faucet by turning on both the hot and cold settings.
Ensure that the water flow is correct and that no leaks form around the handles.
Maintenance Tips for New RV Shower Faucet
You now know how to remove the RV shower faucet. Do not think this is the end of the horizon. An RV owner needs to learn ways to keep everything in shape to prevent premature damage.
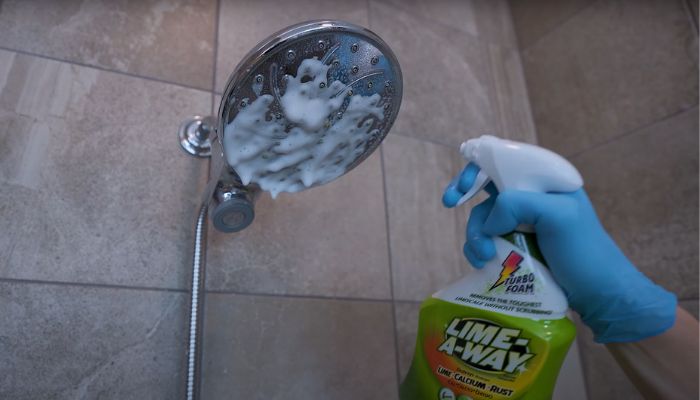
Can you imagine your shower faucet breaking down in the middle of a relaxing rinse, especially on a deserted road? Let us not draw on these potential situations by neglecting basic maintenance.
Here are some tips that will come in handy and provide peace of mind during a journey.
Can I Replace an RV Shower Faucet without Professional Help?
Yes, DIY RV shower faucet replacement has been the oldest custom that runs through this generation as well.
It only needs basic plumbing skills to replace the components without another helping hand. Many RV owners are confident enough to tackle this challenge to save money and time.
However, give yourself a moment to assess the condition of the shower faucet and trust in your abilities. Be confident in your attempts because you never know what you may discover!
Furthermore, it is a good idea to keep instruction manuals at hand or check online resources specific to your RV model. Pretty much all rudimentary to complex plumbing fixture tutorials are available on various web pages.
How Do I Determine the Type of Access Panel My RV Has?
The location and type of access panel in RV models can vary. So how do you determine its type?
1. Snap-on
These access panels snap into place with the assistance of tabs or clips. You can remove them using a small tool to release the clips or apply gentle pressure.
2. Screwed-on
As the name suggests, these are secured to the RV walls using screws. The screw heads are typically visible to the naked eye or have small caps overhead.
3. Removable
The removable access panels can be detached from the walls since they are mounted with the help of magnets or friction. You can lift or pull them out to reveal the plumbing assembly behind them.
4. Hinged
Panels with hinged designs allow door-like swing-open access. It is easy to locate and open due to the simple lock or latch mechanism.
5. Concealed
These are the most difficult to identify, as the panel is seamlessly integrated into the surrounding cabinetry or wall. The RV manufacturer opts for this unnoticeable design to attain a flawless interior.
Is It Necessary to Use Specialized RV Shower Faucets?
Try to compare your RV to a house. An RV consists of limited space, whereas a house is spacious with proper plumbing fixtures. Your RV encounters vibrations since it is, after all, a vehicle, but a house stays on its foundation.
Moreover, the RV environment is quite different than a house. You will need specific or specialized shower faucets for your RV, even though they are unnecessary.
This is to withstand the unique demands of the ride with fluctuating water pressure. The faucet models are usually built with lightweight materials to abate additional strain on the plumbing system.
You can extend the longevity and achieve optimal performance of the product if the shower faucets are RV-specific.
But you can adapt to residential faucets too.
Final Thoughts
So, replacing rv shower faucet without access panel can put your skills into an uncomfortable confrontation, but it is not at all hopeless.
In fact, you may even love the result once there is no leak. Remember that a shower faucet in an RV is an essential component that enables enjoyable showers during a trip.
Also, be mindful of the maintenance to ensure a long-lasting experience on the go.
Similar Posts
![Shower Diverter Is Not Fully Diverting [Solved]](https://faucetfam.com/wp-content/uploads/2023/08/Shower-Diverter-768x448.jpg)
Shower Diverter Is Not Fully Diverting [Solved]
Shower diverters are amazing and serve a good purpose in your everyday shower regimes. So, facing issues with it can feel terrible. But luckily, some minor problems are easy to fix at home. For example,…
![Single Handle Shower Faucet Is Hard to Turn Off [Solved]](https://faucetfam.com/wp-content/uploads/2023/06/Single-Handle-Shower-Faucet-Is-Hard-to-Turn-Off-768x448.jpg)
Single Handle Shower Faucet Is Hard to Turn Off [Solved]
In a single-handle shower faucet, the whole operation depends on one handle. So quite clearly, when it goes bad, things turn frustrating. Especially when a single handle shower faucet is hard to turn off and…
Fix a 3 Handle Shower Faucet that Won’t Turn Off!
Struggling with a 3 handle shower faucet that won’t turn off can get really messy. There are so many factors that can cause this quite common issue with shower faucets. However, fixing this problem can…
![Water Still Flowing From Faucet While Using Shower [Solved]](https://faucetfam.com/wp-content/uploads/2023/06/Water-Still-Flowing-From-Faucet-While-Using-Shower-768x448.jpg)
Water Still Flowing From Faucet While Using Shower [Solved]
So, the diverter basically directs the water from the shower head to the faucet. But over time, there can be an issue with it. That is basically when the water comes out of the shower…
![Water Drips When Shower Is Off and Diverter Is Engaged [Solved]](https://faucetfam.com/wp-content/uploads/2023/06/Water-Drips-When-Shower-Is-Off-and-Diverter-Is-Engaged-768x448.jpeg)
Water Drips When Shower Is Off and Diverter Is Engaged [Solved]
Owners who have a tub spout can relate the water coming when the shower is off. If this ever happens to you, this guide will help! Well, the tub spout leaks when the water is…
Fix Glacier Bay Shower Faucet Low Water Pressure Issue!
Dealing with the glacier bay shower faucet low water pressure issue is terrible but some quick troubleshooting may fix this easily. To fix a glacier bay shower faucet having low water pressure, the most common…