Delta Touch 2 O® Troubleshooting Guide [Solved]
The Delta Touch2O faucets are not only stylish, but they are incredibly convenient to use. In fact, it is one of the go-to choices for homeowners who are looking for a high-end faucet.
However, as with any technology, issues can surely come up with the Touch2O models.
Leakage, the Touch2O faucet not working, issues with the LED light, and the faucet turning on by itself are the common issues of the Delta Touch2O faucets.
Now, the good news is that the issues are not that challenging to fix. Yes, you read that right!
And if you stick to this Delta Touch2O troubleshooting guide, you can get the faucet up and running in no time at all!
Delta Touch2O Faucet Dripping – How to Solve
Dripping and leakage issues are some of the things that most kitchen faucets suffer from.
And while the problem is very annoying, it does not require you to go through any demanding steps.
Also, once you understand the causes, things become a piece of cake!
Causes
How to Fix the Leakage Issue of Delta Touch2O Faucet
Repairing the leakage issue of the Delta Touch2O faucet is easy through the following steps −
1. Clean the Aerator With a Vinegar Solution
In case you don’t know what the aerator is, it’s a small screen that is on the end of the faucet head. Its main job is to control the pressure and the flow of water.

However, mineral sediments and debris can clog it up over time, making the faucet drip or leak.
Gently remove the aerator from the faucet and leave it in a solution of vinegar and warm water overnight. Rinse the part with water and put it back in place.
2. Replace the O-Rings and Washers If They Are Worn
The O-rings and washers are on the inside of the faucet. These small parts help create a secure seal and prevent water from leaking.
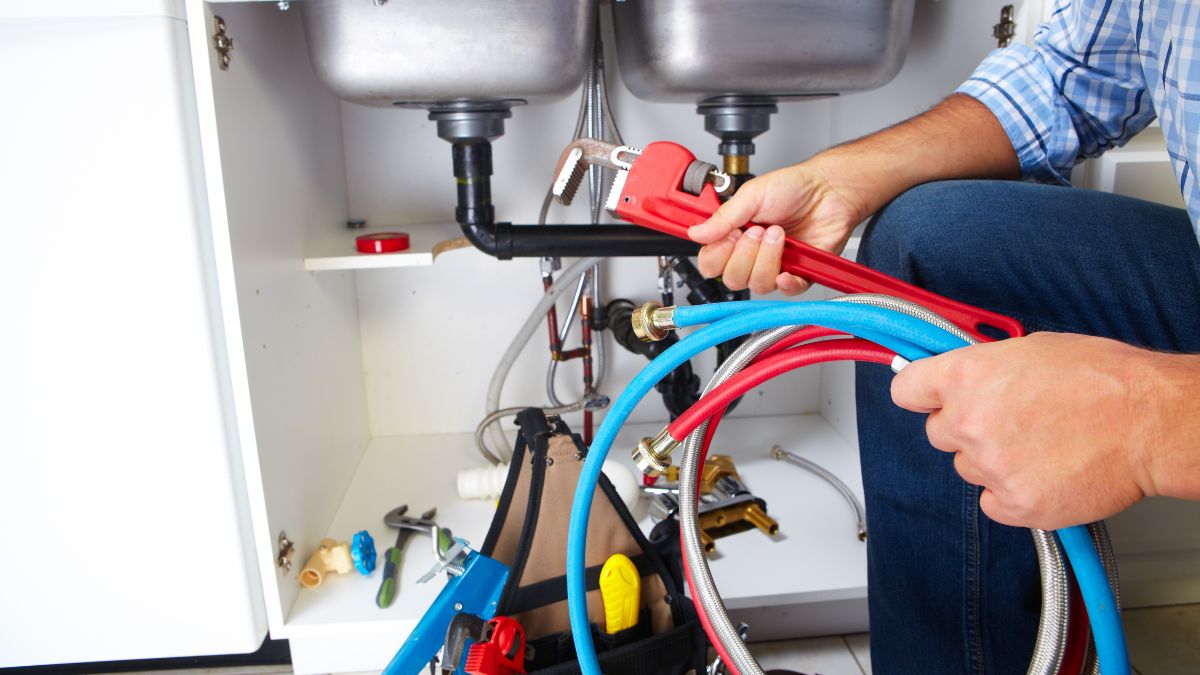
But like any other components, they can become damaged. Refer to the user manual and disassemble the faucet.
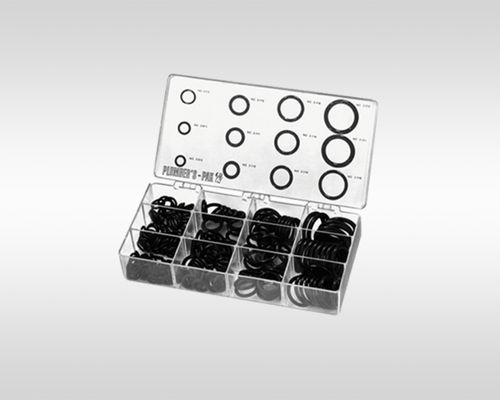
Check all the O-rings or washers and see whether there are any signs of breakage or cracks. If so, replace them with new ones.
3. Clear the Corrosion from the Valve Seat
The valve seat is responsible for allowing and stopping the flow of water. But, when corrosion settles on top of it, it can let the water leak past when it is in the closed position.
Turn the water off and disassemble the faucet with a wrench. You can take help from the user manual for the disassembly process.
Get a wire brush and get as much corrosion as possible from the valve seat after removing it. Then, put the valve seat into vinegar and warm water solution.
Let it sit for a while. Once the corrosion is all gone, you should rinse the valve seat with clean water and put it back in place.
Delta Touch2O Faucet Not Working – Troubleshooting Steps
It would be normal for you to panic when you find that the Touch2O faucet is not working at all. However, like the other common problems of the model, the fix for this issue is pretty straightforward.
Causes
How to Fix Delta Touch2O Faucet Not Working at All
Follow these steps to fix the operation issue of the Delta Touch2O and keep your kitchen running smoothly.
1. Replace the Batteries
Delta Touch2O battery pack batteries can last anywhere from one to two years. However, if the cells are not heavy-duty, you might need to replace them after a couple of months.
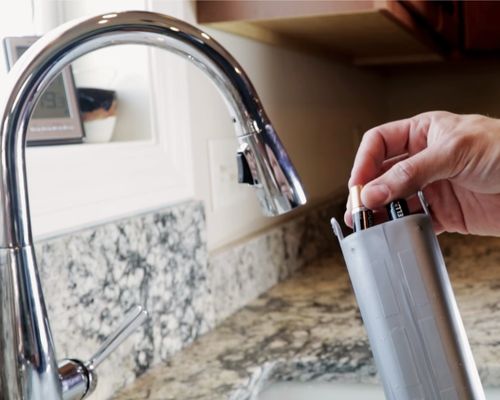
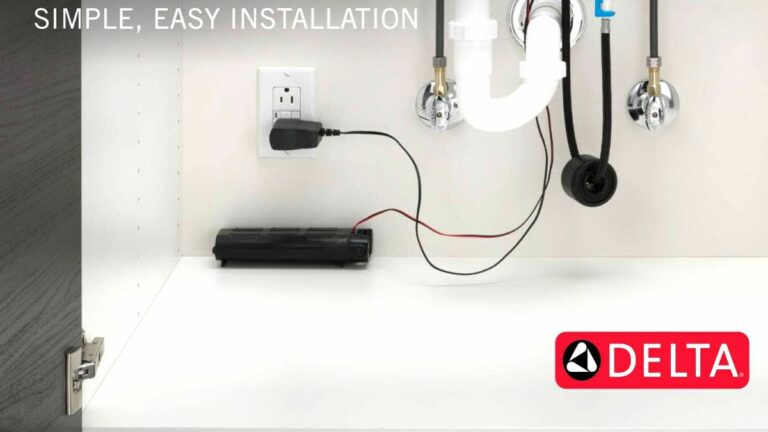
Nonetheless, when the electrical components of the faucet do not get power, the faucet will not turn on. Locate the battery pack and replace the batteries with new cells.
Don’t know where the pack is? It is under the sink. Be careful while taking the lid off, as the wire attached to it is prone to damage.
2. Check and Replace the Wall Adapter
Some of the Touch2O faucets will come with an AC adapter. And if there is a problem with it, the faucet does not get the power that it needs to work optimally.
So, the next step of action would be to replace the wall adapter.
Also, make sure that the wall outlet has proper grounding. Improper connection on the wall will make the faucet output different types of issues.
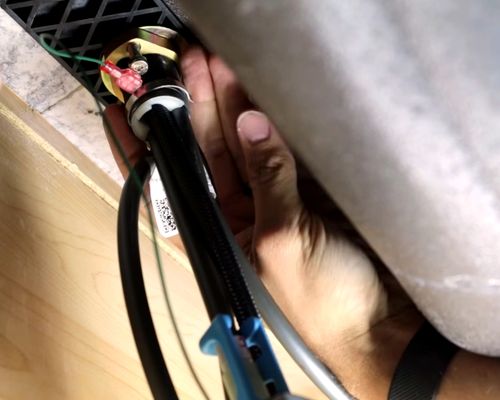
3. Inspect the Wires and Make Necessary Adjustments
The faucet not working issue can arise due to wire problems. Make sure that the wires are not crossed.
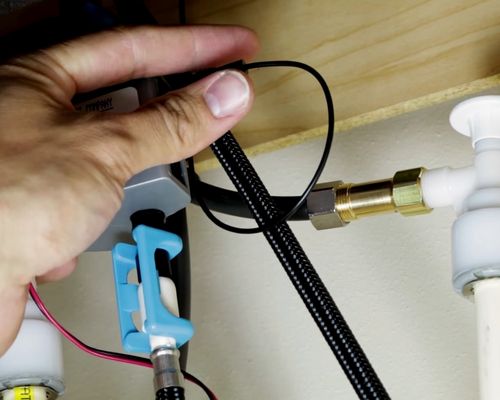
If you find them in such a condition, you need to move them around. Also, make sure that they are not making any contact with metal.
That will cause short circuits within the electronics, hindering the faucet from working correctly.
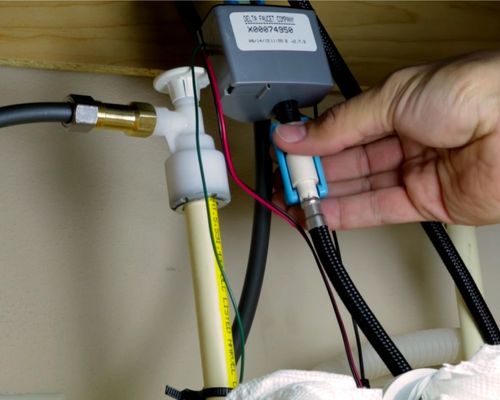
4. Replace the Solenoid
Delta Touch faucets will stop working when there is an issue with the solenoid. To do so, disconnect the batteries, remove the mounting shank, pull out the wire from the solenoid assembly, and get the old solenoid out.
Put the new solenoid in place and put all the parts back in place. And then, connect the faucet to the battery and see whether the faucet is working correctly.
Delta Touch2O LED Light Issues
LED light blinking red and the LED not blinking the blue light are some of the issues you can face with the Delta Touch2O.
And while these problems will not hinder you from using the faucet, they will not let you know the status.
Causes
1. How to Fix the LED Light Problems of Delta Touch2O
These steps will let you fix the LED light issues of the Delta Touch2O faucet and let the LED show the right status again.
2. Replace the Batteries
The blinking red LED light states that the batteries are almost out of juice. When you see it showing such a status, you need to install new batteries in the battery pack.
Make sure to get the orientation right. Otherwise, the faucet will not get power.
3. Check the Wires and Adjust Them Accordingly
Make sure that the wires are separated from each other. They should be at least 2 inches apart. Also, they should not be making any contact with any metal.
4. Adjust the Solenoid or Replace It If Required
The solenoid is a crucial electrical component of the Delta Touch2O. It needs to be in good condition for the faucet to offer optimal performance.
So, disassemble the solenoid assembly and check the installation of the solenoid. Refer to the user manual and adjust it accordingly.
However, if the LED light is still malfunctioning, you will need to replace the solenoid.
Delta Touch2O Activating Automatically
The faucet generally activates automatically due to the issues related to the sensor. But there can be other reasons too.
Causes
How to Fix the Automatic Activation Issue of Delta Touch2O Faucet
If your Delta Touch2O is activating by itself, you need to go through these steps to troubleshoot it:
1. Check and Adjust the Grounding Pins
This step applies to all the Delta faucets that came out before February 2009. There will be green wire under the sink for grounding purposes. You need to see whether it is in the correct position. If not, take the help of the user manual and adjust its position.
2. Inspect and Insulate the Wires
The faucets that came out after February 2009 will not have the green wire. For those, you need to check the insulation of the cables. Secure them with tape if you have to.
3. Clean the Sensors
There are two sensors on the Touch2O. The first is connected to the handle, while the other is on the spout. Clean both the sensors and ensure they have the right amount of insulation.
How to Reset Delta Touch2O Faucet
Facing other issues that are not discussed in this guide? In that case, you should reset the Touch2O faucet. And the steps to do so are as follows:
That’s it! These four simple steps will enable you to reset the Touch2O faucet. And this could potentially fix some of the uncommon issues of the model.
Final Words
The Delta Touch2O technology is one of the things that makes Delta’s faucet stand out. But at the end of the day, it is an electronic part that can indeed output different issues in the long run.
However, as you can see from the Delta Touch2O troubleshooting steps, the problems are not that hard to take care of.