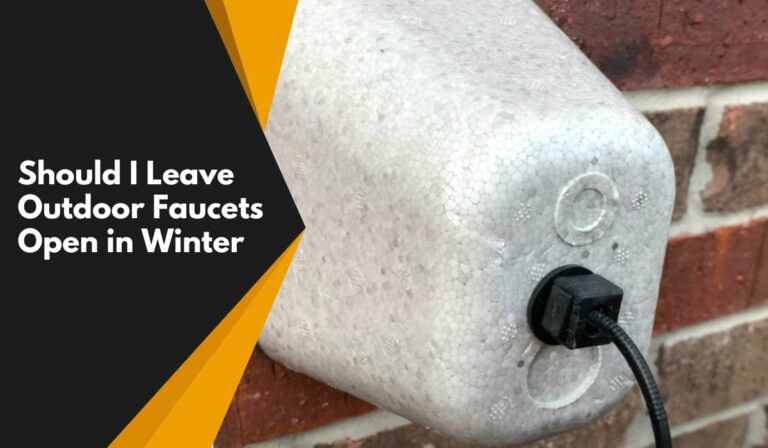
How to Repair a Leaking Anti Siphon Valve? [Solved]
The main role of the anti-siphon valve is to stop contaminants from flowing back into the clean water source. But, it can leak when its inner parts face some issues.
In most cases, minerals buildup, damaged rubber gasket/O-ring, or bad vacuum breaker are the root reasons for anti-siphon valve leaking. To fix it, clean the minerals, replace the rubber parts, or change the vacuum breaker.
Here I’ll share the reasons for this kind of water dripping in an anti-siphon valve and give solutions that you can try at home. Stay Tuned!
Why Is Your Outdoor Faucet’s Anti Siphon Valve Leaking?
If your outdoor faucet anti-siphon valve is leaking and it seems ongoing, then it’s time to find the reasons. Here are some of the root causes of this issue:
1. Contaminants on the Seal and Plunger
Most of the time, minerals, dust, or other contaminants build ups on the seal, and the plunger can cause leakage.
It’s because the plunger doesn’t seal the vent and so the water comes out of the small gaps causing a leak. To fix that, you’ll need to clean it ASAP.
2. Broken Rubber Parts
The anti-siphon valve contains a rubber gasket or O-ring in the vacuum breaker part. These components can crack or degrade from the freezing water inside the spigot.
Due to this, it can cause your outdoor faucet leakage. In that case, just change the valve and it’ll resolve the issue.
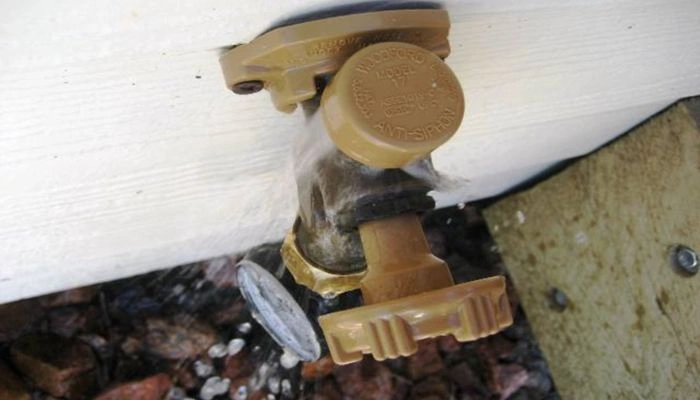
3. Damaged Vacuum Breaker
Inside the anti-siphon valve in the outdoor faucet, you’ll see a plastic vacuum breaker that prevents water from reaching the handle area.
When this part gets damaged, it can cause a serious leakage issue. If this happens to your faucet, then immediately replace the vacuum breaker part with a new one.
Repairing a Leaking Anti-Siphon Valve in Outdoor Faucet!
It is easy to resolve the leakage issue if you have all the tools. Be sure to identify the spigot manufacturer before getting the mentioned tools and then beginning the procedure. Let’s get started:
Tools that You’ll Need
- Calcium buildup remover or cleaner
- Tiny toothbrush
- WD-40 lubricant
- Tape or cap
- An adjustable wrench
- Flat screwdriver
- A pair of needle-nose pliers
- Vacuum breaker kit
- Gasket and O-ring
Step 1: Preparation
To begin with, turn off the water supply of the house so that leakage doesn’t bother you during the fixing process. Then, get all the tools from the nearby plumbing store.
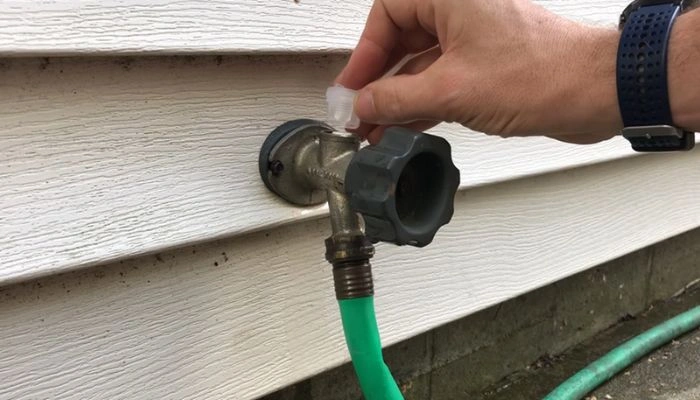
Next, organize them beside your working zone. Also, if a garden hose is attached to the outdoor faucet’s mouth, then remove it.
Step 2: Fix the Leaking Issue
After you have finished taking preparation, it’s time to troubleshoot the leakage in the anti-siphon valve. Be sure to pick a solution based on the cause of the water dipping.
Solution 1: Clean the Anti-siphon Valve for Calcium Buildup
- If the culprit is calcium buildup in the anti-siphon valve area, then start by opening the cap of it using your hand or an adjustable wrench.
- Make sure to use the WD-40 lubricant spray with a straw if the anti-siphon valve cap is stuck or won’t loosen up.
- Now, take out the vacuum breaker with the adjustable wrench or a pair of needle-nose pliers. After that, close the outdoor faucet with waterproof tape or a cap.
- Next, fill some calcium buildup cleaner or remover inside the pipe and wipe the surface with a tiny toothbrush.
- Then, remove the tape or cap from the outdoor faucet’s mouth and wait for around 30 minutes. Afterward, run the water supply to flush the calcium buildup and reinstall all the parts.
Estimated Time: 45 Minutes
Cost: $6 – $20
Solution 2: Change the Rubber Parts
- Once you detect that the rubber parts are the cause of the water dipping issue, open the cap of the anti-siphon valve with the right tool.
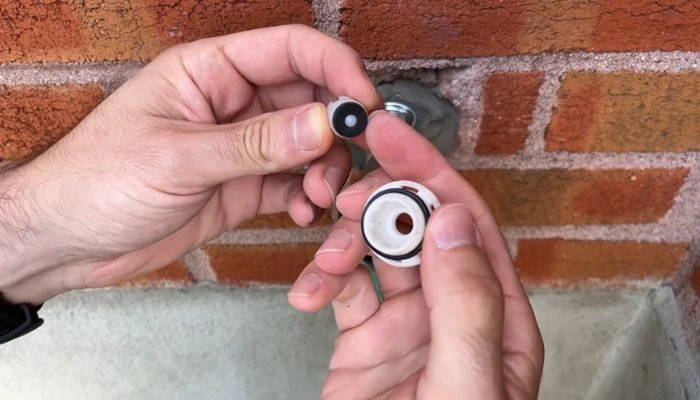
- Next, take out the vacuum breaker and inspect its condition. In some vacuum breakers, the gasket and O-ring are white (difficult to see). So, check deeply to find these parts.
- Then, use the flat screwdriver to remove its inner plunger and detach the rubber gasket. In the same way, take out the O-ring inside the body of the vacuum breaker. If the rubber gasket or O-ring is broken, remove them.
- Based on the size of these components, insert them. Next, reattach all the parts and turn on the water supply.
Estimated Time: 20 Minutes
Cost: $5 – $20
Solution 3: Change the Vacuum Breaker
- Just like I’ve mentioned above, remove the vacuum breaker part if it’s causing water leakage.
- Next, bring the new anti-siphon valve repair kit and insert the inner plunger into the body.
- Then, attach it inside the old vacuum breaker spot and twist it to lock it into place.
- After that, insert the new cap and tighten it out. Now, turn on the water supply.
Estimated Time: 15 Minutes
Cost: $6 – $12
Step 3: Checking the Repaired Valve’s Performance
Once the water supply of the house is turned on, you’ll need to open the outdoor faucet’s handle to flow some water.
That way, you can confirm if the solutions to fix the leakage issue worked or not. Be sure to inspect the water dipping in the anti-siphon valve area to confirm the success.
In Conclusion
If the above fixes don’t solve the anti-siphon valve leaking issue, it’s a clear indication that you need to seek expert assistance.
In such a case, contact the manufacturer of the outdoor faucet and tell them about the situation.
Under the warranty service, they’ll mostly replace the part. However, if there’s no warranty backup, just replace the part under $150 or more bucks. Hope this helps!
If you really like this guide and find it beneficial, then I suggest reading the guide to share temporary fixes for a leaky bathtub faucet. Happy Reading!
![Outdoor Faucet Leaks When Turned On and Off [Solved]](https://faucetfam.com/wp-content/uploads/2023/07/Outdoor-Faucet-Leaks-When-Turned-On-and-Off-768x448.jpg)