Replacing an Outdoor Faucet on a Brick House: Step-by-Step Guide!
When your outdoor faucet is leaking or having an issue with running water smoothly, it sometimes indicates that you need to change it.
To replace outdoor faucets on brick house walls, the process is diverse based on the type of spigot. If it’s the threaded faucet, use an adjustable wrench to remove and install the part. However, you’ll need to cut the pipe and then insert the soldered outdoor faucet.
Don’t worry if you find the above description hard to understand. In this guide, I’ll help you by showing you how to do this project without making mistakes. Let’s go!
How To Replace Outdoor Faucet on Brick Wall?
You can replace an outdoor spigot on the brick wall if you follow the right instructions and have the needed gears. Let me show you exactly how to do it yourself:
Things You Should Prepare
- Turn off the water supply to the home.
- Inspect and check to know if the outdoor faucet is screwed on (threaded) or soldered.
- Detach the garden hose if it is attached to the outdoor faucet.
- Change your dress and wear old clothes to completely do the work.
Changing Screw-on Outdoor Faucet on Brick Wall
If your outdoor faucet or spigot is connected via the screw-on method, the procedure will be different than the solenoid type. Here’s the detail of the procedure:
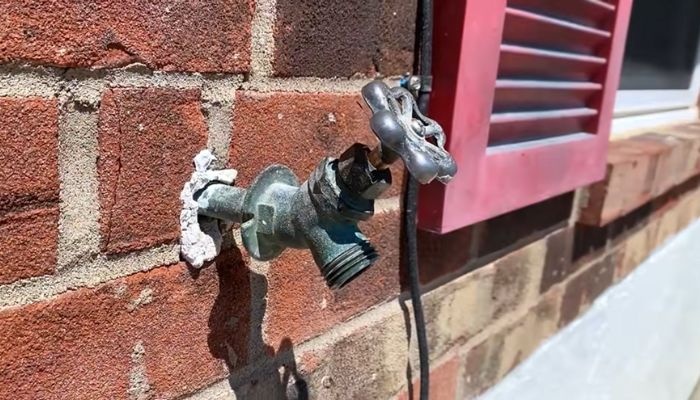
Step 1: Inspecting the Existing Faucet
The first thing you’ll need to do is to inspect the existing outdoor faucet condition to understand the issue. If it can be fixed via simple repair, you won’t need to replace the whole part.
However, if the part seems terrible, then be sure to replace it. For that, check the faucet brand and model to get a similar type.
Step 2: Gathering Tools and Materials
Next, you’ll need to get all the necessary tools that are required to continue the project. In the nearby local plumbing store, you can find all these gears and materials. Here is the list of tools needed for the replacement:

If you get confused, be sure to learn the basic difference between a spigot vs faucet before buying one
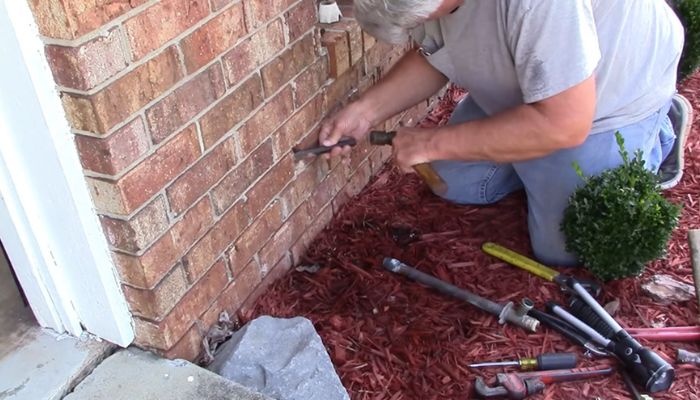
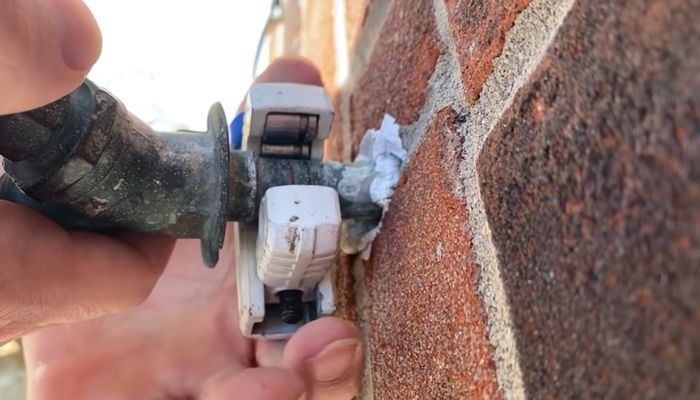
Step 3: Removing the Old Faucet
Then, use the screwdriver and simply unscrew the middle screw that holds the faucet’s handle. After that, insert the adjustable wrench to rotate the threaded or screw-on spout from the pipe.
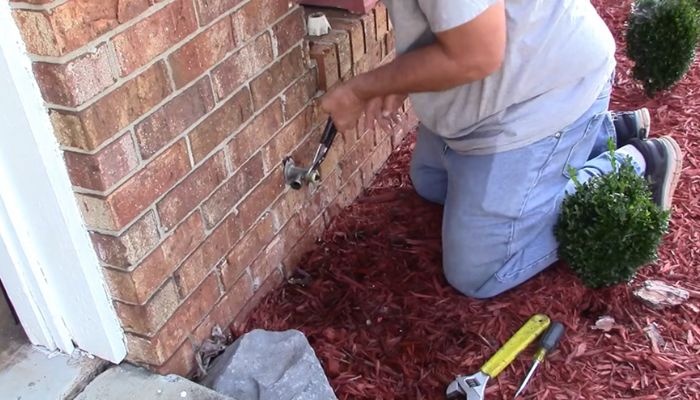
If it seems tough to do so, ensure to use the vise grip and gently twist the outdoor faucet (so that it doesn’t break apart). Then, simply pull it out using your hands.
In case the faucet is stuck and doesn’t come out, ensure to apply WD-40 lubricant and let it stay there for 15 – 30 minutes. And then, try again.
Step 4: Measuring the Old and New Faucet
To fit into the same brick surface, you need the right measurement of the old faucet before adding a new one. For that, ensure to place the old faucet and new faucet side by side.
If the new faucet is a little smaller and thinner than the old faucet, then ensure to attach a right-size adapter to ensure a perfect fitting.
If the new faucet is a little bigger and wider than the old faucet, then you’ll need to widen the hole in a brick wall. For that, use a hammer and chisel to widen the hole. Or, use a pneumatic hammer drill machine with an appropriate drill bit.
Don’t worry if you make a mistake and widen it too much as you can cover it up using the cement and water mixture
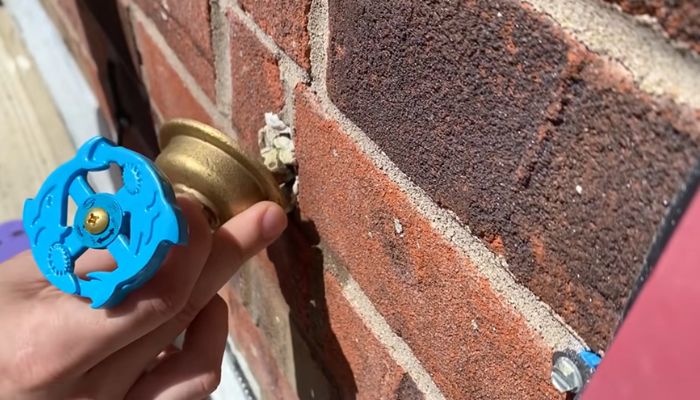
Step 5: Installing the New Faucet
Now, you’ll need to insert the thread pipe tape on the edge of the faucet pipe. Then, insert it into the hole in the brick wall and attach the outdoor faucet by twisting it with your hands.
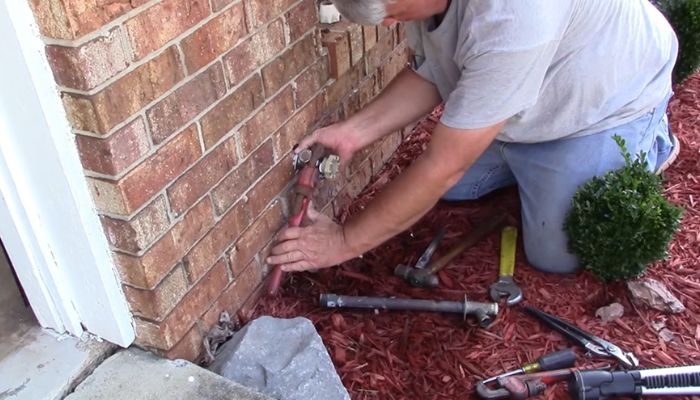
After that, tighten it out with the adjustable wrench or vise grip with gentle pressure to avoid harming the body. I would suggest you remove the handle part and then tighten it out to get a max grip.
Then, reinsert the handle by attaching the screw in the middle with a screwdriver. Also, ensure to tighten out the vacuum breaker assembly part with the adjustable wrench.
Step 6: Sealing and Finishing
Lastly, you’ll need to apply the plumber’s putty or sealant on the open area. To do that, ensure to use a putty knife. After that, turn on the water supply and check for any leakage around the faucet.
Changing Soldered Outdoor Faucet on Brick Wall
In case you have a soldered spigot on the brick wall, it will require different tools and methods to change the faucet. To do it, follow the given direction:
Step 1: Check the Outdoor Faucet
To begin with, you’ll need to look at the existing spigot’s condition to know. If it is good in the state but showing issues, then do the minor repair like changing the O-ring, gasket, and so on.
Or else, you can continue the given steps to replace the part. Before that, note down the brand and model to get the exact outdoor faucet without having a size issue.
Step 2: Get All the Gears
Then, bring all the gears that you’ll need to do the following steps. Here are the tools that you’ll need to replace the outdoor faucet:
Step 3: Cutting the Old Faucet
Next, use the plumber’s wrench to hold the outdoor faucet while clamping the copper tubing pipe cutter on the pipe. Try to insert the cutter right on the end of the faucet part. Ensure that the pipe has at least a 0.5″ or 1.3 cm part to attach the compressor adapter.
Then, tighten out the copper tubing pipe cutter and start to rotate the knob to cut it in the perfect shape. Keep on doing it until the pipe is cut apart. Instead of the pipe cutter, you can also use a hacksaw to do the task.
In case you don’t have a cutter or hacksaw, then just use the kitchen gas light on the pipe and rotate the faucet with the plumbing wrench. That way the part will come out thanks to the heat.
Step 4: Sanding Out the Pipe
Afterward, you’ll need to sand down the pipe with a 50-grit or wet sandpaper to get rid of the rust and other stuff from the surface.
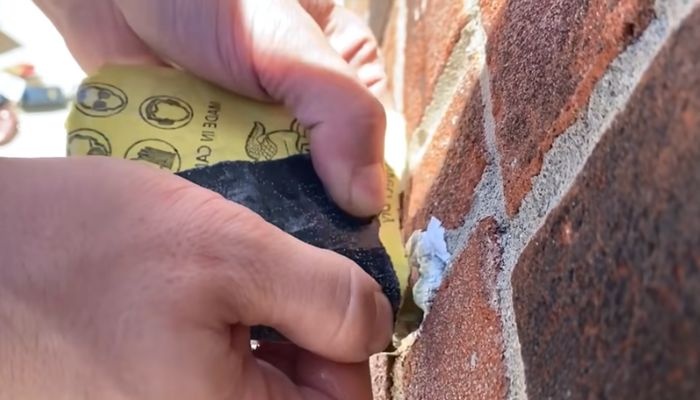
Rather than this, you can also use steel wool to easily get the clean finished pipe. For that, you’ll need to wipe the pipe properly.
Step 5: Attaching the New Faucet
Now, you’ll need to measure the pipe and based on that attach an adapter. Just slide the compression adapter into the end of the pipe. For that, you can use a plumber wrench to hold the pipe when doing the work.
Next, insert the thread pipe tape on the pipe’s thread to airtight the surface. After that, place the new outdoor faucet into the adapter and start to twist it with your hands. And then, tighten it out using the adjustable or plumber wrench.
Since it’s the soldered faucet, this doesn’t require sealant or plumber’s putty to ensure no leakage unlike the screw-on or threaded type. After replacing the faucet, turn on the water supply of your home and test it out.
Some Factors That You Should Look At!
To prevent damaging your outdoor faucet, you’ll need to take care of it. Here are some tricks that will help you to avoid replacing the outdoor faucet often:
Ending Notes
Replacing an outdoor faucet on a brick house wall is super simple to do. You only need to have the basic skill to know how to use all the tools.
If you find the water drip or leak after the replacement of the spigot, ensure to tighten out the faucet. Or, seek quick help from a plumber to change the outdoor faucet.
I hope you find it helpful and detailed enough to follow. Be sure to try the described method and save around $100 – $300. Good Luck!

![How to Repair a Leaking Anti Siphon Valve? [Solved]](https://faucetfam.com/wp-content/uploads/2023/07/anti-siphon-valve-leaking-768x448.jpg)

![Outdoor Faucet Leaks When Turned On and Off [Solved]](https://faucetfam.com/wp-content/uploads/2023/07/Outdoor-Faucet-Leaks-When-Turned-On-and-Off-768x448.jpg)