How To Replace Shower Valve Without Cutting Wall
No matter how good is the shower setup, you will face some issues in the long run. And when it comes to valve-related problems, the easiest solution is to replace it. But can you replace just the shower valve? Also, can you replace shower valve without cutting wall?
You install a new shower valve without damaging the wall. To do so, you need to remove the handle, valve cover, and valve with a hex socket.
Want to learn about the process in detail? Well, you will find all the guidelines about it below. So, keep on reading.
Can You Replace the Shower Valve Without Removing the Tile or Cutting the Wall?
Yes, you can install a new shower valve without getting the tile removed or damaging the wall. But, as you are not cutting the wall, you can not follow the regular process.
What improvisation do you need to work with? Unlike the normal process, where you must take the valve out with a wrench by making a hole, you must use a hex socket.
This tool will let you get the old valve out and the new valve installed without causing any damage. Of course, to use the hex socket, you can opt for a torque wrench or an adapter with your drill machine.
But as you will be working with a limited amount of space, it would be better to purchase the adapter. The hex socket installed in the drill machine will make things much more manageable.
How to Replace Shower Valve Without Damaging Wall
You do not need to go through any extra hassles to remove the shower valve without damaging the wall. Just follow these simple steps –
1. Close the shut-off valve
First of all, stop the water flow. You must turn the shut-off valve connected to the shower line to do so. If your home does not have a dedicated unit for this waterway, shut the main line off.
2. Plug the drain
In addition to shutting the water flow, you should block the drain. Wondering why? As you will be working with plumbing parts, you can drop a small piece during the process.
And if that dropped part goes into the drain, it will be gone forever. That would eventually call for extra purchases.
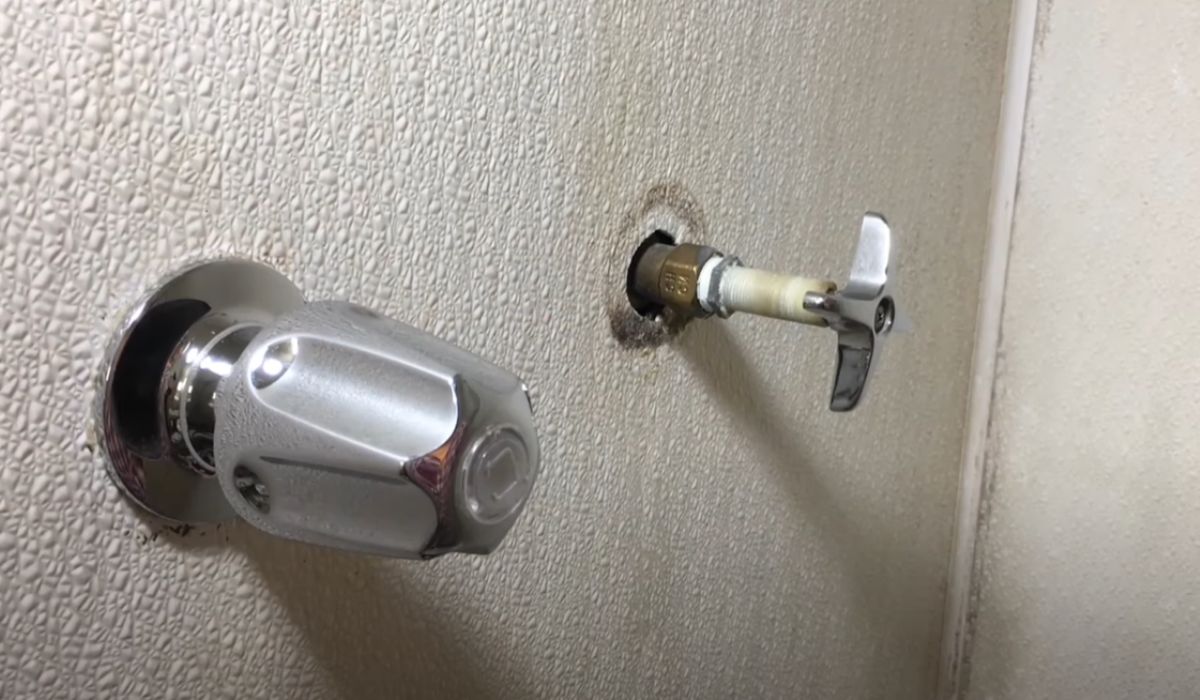
3. Remove the cover plate of the handle and take it off
With the preliminary steps done, it would be time to work with the handle. Get yourself a flat-head screwdriver or something sharp to remove the top cover of the handle.
There should be a screw or nut beneath it, which you need to unscrew with a wrench or a screwdriver. Once that screw is out, the handle should come right off.
4. Remove the valve cover
You should grab the plate and rotate it counterclockwise to get the valve cover off. Wear rubber gloves if it appears stuck or difficult to turn. That will offer you a better grip and let you remove the cap with minimum effort.
But you should use a wrench if the cover does not cover off. Use some plumber’s tape to cover the jaws. Otherwise, there will be marks on the plate.
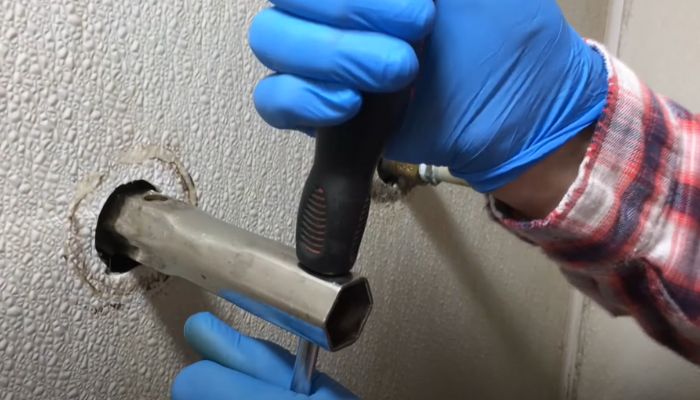
5. Use the socket wrench to take the shower valve out
This is the most crucial step of the entire process. Basically, you first need to decide which hex socket size you need. It’s better to get a shower valve socket set and check manually which one fits.
Once you find the right size, install it on the socket wrench or drill machine. Turn counterclockwise to loosen up the shower valve, then remove it.
6. Install the new valve
For the replacement valve, you should make sure that it matches the old one. You can only install it in place if it is the same size as the faulty valve. Otherwise, the replacement will require you to make a large hole.
To install the new unit, put some tape on the threads first. It will ensure that the water does not leak or flow from the tub but not the shower.
Afterward, put the new valve in place and attach it to the socket. Turn it clockwise and secure it in position.
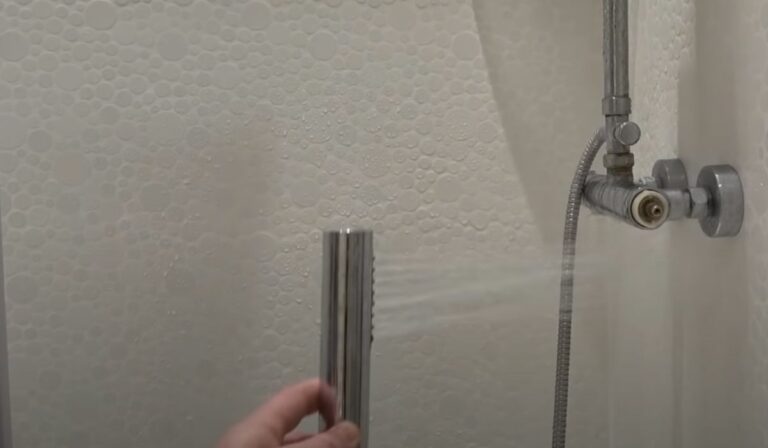
7. Reinstall the valve cover and handle
Now that you are done replacing the shower valve, it’s time to get the valve cover in place. Position it and rotate it clockwise with your hand. Once that’s in place, reinstall the handle.
Frequently Asked Questions
1. What are the common causes of shower valve failure?
Dried-out O-rings, corrosion, rust, mineral buildups, and valve seals wearing out due to friction are the common reasons a shower valve might fail.
2. How much does it cost to replace a shower valve?
On average, the shower valve replacement can cost $315. However, it depends on your shower model and the installation’s complexity.
3. How often should you clean the internal parts of a shower?
If your water supply has hard water, it’s better to clean the internal parts after every 3 months. Also, consider investing in a water softener to reduce sediment buildup damage.
Final Words
That’s pretty much everything regarding how to replace shower valves without cutting walls. And as you can see, the main takeaway is to use a hex socket and get a matching replacement part. With these two checked, you can finish replacing the valve pretty much within an hour!

![Water Still Flowing From Faucet While Using Shower [Solved]](https://faucetfam.com/wp-content/uploads/2023/06/Water-Still-Flowing-From-Faucet-While-Using-Shower-768x448.jpg)