How To Fix Shower Faucet Leaking From Handle – An All-In-One Guide
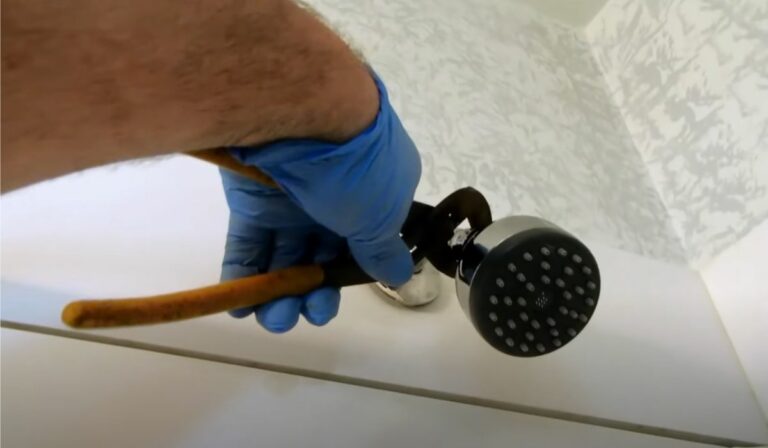
While taking a shower is a blissful routine in our daily lives, a leaky faucet handle can ruin that in an instant.
But what does a shower faucet leaking from handle indicate?
Typically, the culprit is a worn-out cartridge that regulates the water flow. However, other issues like loose O-rings or improper faucet installation can eventually take a hit on the pretty handle base, leaking and staining all over the tub.
If you want to take the matter into your hands instead of calling a plumber, why not do it like a pro? Continue reading to learn everything you need to know!
Why Is My Shower Faucet Leaking From the Handle?
The shower area gets wet and misty as it is, but to face a leak at the same time? I call that an appalling act of inflexibility.
It practically signifies that I had not done a good job installing the faucet or fitting a quality component. This is unacceptable.
If you are in a similar situation, it is wiser to figure out the causes before the excessive drip disaster happens.
Possible Causes of a Shower Faucet Leaking From Handle
Ask why instead of going straight to the how; it can save a lot of hassle when buying the necessary parts from the store.
1. Damaged/Loose Cartridge or Valve Stem
This is your main suspect, responsible for controlling the flow of water.
It means the cartridge or the valve stem is why your shower goes smoothly with the proper speed and the right volume of water cascading from the shower head.
Now what happens when that flow gets disrupted? You got it right— a leak or no good flow.
It occurs when the component has been in service for many years and has finally worn out to the point of leakage. Or it can be a defective product right from the start.
Brushing with other parts can also damage the stem or cartridge. The main point is to check it out before upending the main water system.
2. Worn-out O-rings
If you do not know what O-rings are, it’s easy to recognize them. You have probably seen them in many fixtures and fittings, too.

They are shaped like small rubber or plastic rings, usually between the handle and the faucet body. Their main job is to create a watertight seal to prevent leaks.
The material of these rings wears out in time, and that is when you will notice trickles from the base of your shower handle.
3. Corroded Valve Seat
A handle is pretty much incomplete without its valve seat. It also looks like a big, robust ring, but the difference is that it is metal. The component connects the faucet body to the valve stem or cartridge.
Nevertheless, metal pieces can face corrosion due to constant contact with water or elements in the water. So, this is another suspect to look into.
4. High Water Pressure
Perhaps the culprit is not any of the above. Then you must examine the overall water pressure system.
If you notice recurrent leakages even after replacing most of the old components with new ones, it may be that the water pressure is set too high. This strains the internal components, leading to unpleasant trickles.
5. Improper Installation
Another reason is the unsystematic installation. Not everyone is cut out to be an excellent DIY plumber on the first try. There is no shame in it.
However, you may want to inspect your work from the get-go to notice any improper component installation.
It can also be a simple negligence of an appropriate tightening of a piece and nothing more!
Fixing a Leaking Shower Faucet Handle
Calling a plumber for a simple leak can be costly. Some prefer to handle it themselves because it looks easy-peasy.
The probable causes are mentioned above already. Now it is time for the fixes. At this point, you should gather suitable tools, some of which you may have to purchase. They will come in handy in the future.
- New Cartridge, O-Rings, or Valve Seat (purchase the one that appears damaged after inspecting)
- Cartridge Puller
- Phillips Screwdriver
- Needle-nose Pliers or Pliers
- Steel Wool or Fine Sandpaper
- Silicone Grease
Are you ready? Let us see how to fix a leaky shower handle without breaking a sweat.
Step-by-step Instructions
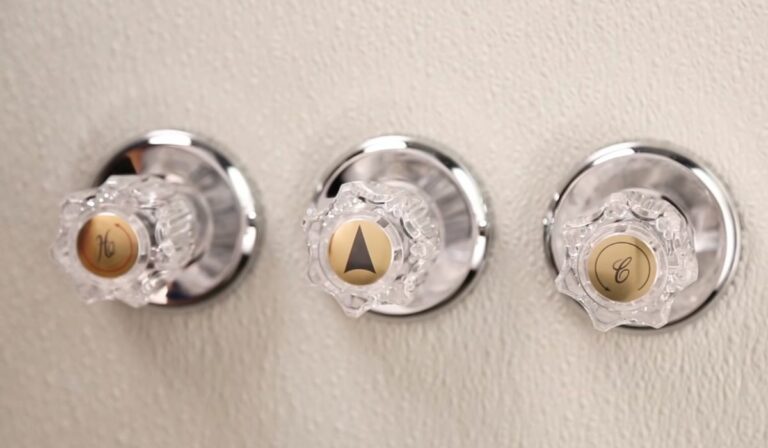
Before we begin, know that shower handles can have different designs. The basic indication for taking it off involves removing an obscured screw.
Sometimes it can be hidden underneath a faucet cap; other times, it is a tiny hole at the base of the lever handle.
Additionally, follow the instruction manual of the cartridge puller before using it. This will help you prevent damaging the new valve stem.
And now we begin:
Step 1: Turn Off the Water Supply
The first and main task is to turn off the water in the broken shower handle before removing anything. Otherwise, there will be a fierce flooding situation.
Locate the main water shut-off valve for your home. Some have it in the basements by the front foundation wall, under the kitchen sink, on the lawn close to the front foundation wall, near the furnace or heater, etc.
If you have a separate shut-off valve for the shower, all the better!
Step 2: Block Tub Drainage
Close the drain section in the tub or floor to avoid dropping any small pieces inside by accident.
Step 3: Remove the Screw
Remember the hidden screw I mentioned earlier? It can be under the decorative cap, which you will have to pry open with a flathead screwdriver. Be gentle about it.
If the handle offers no cap, look for a tiny slit/hole behind it.
Once you find the screw, remove it while holding the handle in place.
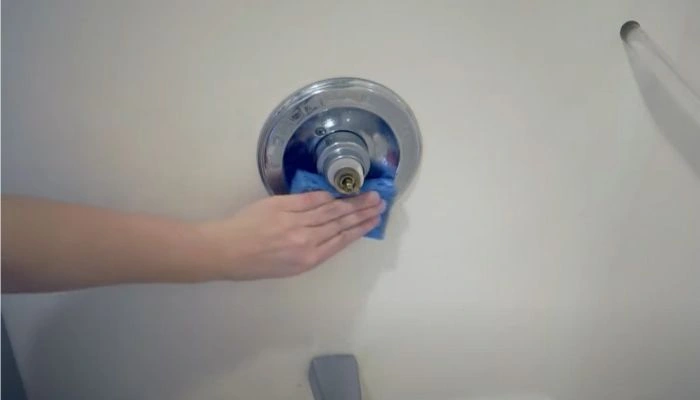
Step 4: Remove the Handle
Now slide the handle off to expose the internal components (temperature limit stop, stop tube, trim plate, etc.).
Step 5: Remove Components
Inspect each piece for damage and take them out, one by one, to access the cartridge. You may have to use a screwdriver to remove some. Try to place those components on the floor in sequence so you can reinstall them in the right order later.
Remove the screws or a retainer clip from the cartridge as well. Free it from all the obstacles carefully so nothing drops behind the wall.
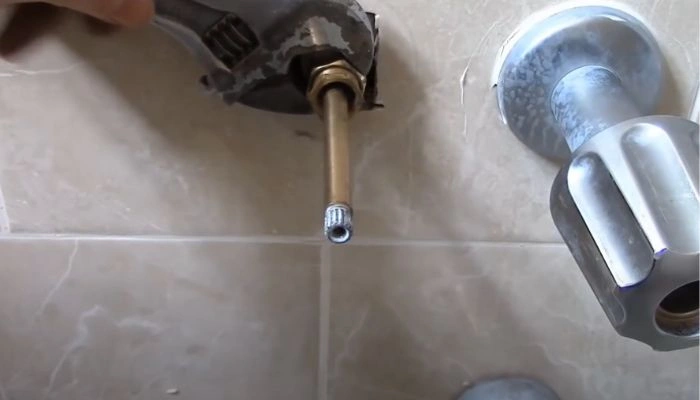
Step 6: Pull Out the Cartridge
New cartridges are easy to pull and take out. But older ones are strong-headed due to the calcium buildup. So, use the cartridge puller after reading the instructions and slowly remove the component.
Step 7: Remove the O-Rings
Do you notice a couple of O-rings behind it? You can remove them, too, since all new cartridges should have new O-rings. Besides, it clears the fear of leaving something old.
Step 8: Install New Cartridge/Valve Stem
Now install the new cartridge by reversing the removal process you utilized earlier. You can lubricate the area before installing it so it sits nicely.
Step 9: Reassemble Everything
Finally, reverse all the removal steps to reassemble the faucet. Put back what you took out in proper order.
Secure the handle with the concealed screw and turn on the main water shut-off valve to restore water flow.
Also, turn on the shower handle to check for leaks or drips.
If the issue is with a valve seat, O-rings, or improper installation, you can replace the faulty components and reinstall everything else correctly. Check the water pressure regulating valve as well and adjust it to achieve the desired pressure.
Remember that the same instructions apply for repairing a leaky hot water shower faucet if yours is a dual-handle system.
Maintenance Tips for Shower Faucet Handle
When you ask yourself, ‘How do I stop my faucet from leaking at the handle?‘ you are practically on the verge of desperation.
What if the question was something like this instead: How do I avoid future leaks after fixing the current one?
Replacing a cartridge does not conclude your plumbing journey. You need to maintain the faucet handle to keep it in good condition.
This will stop the constant fixing and buying of parts, or worse, seeking a professional for something more grievous.
Here are some universal tips:
- Clean those handles regularly to remove any grime, dirt, or buildup that can accumulate over time.
- The handles or other parts of the faucet may become loose with age. Retighten any fittings or screws without overdoing them.
- Check for leaks periodically and fix them promptly instead of leaving them alone.
- Do not delay replacing the worn-out parts if you notice any.
- Lubricate the areas with moving parts. It prevents stiffening or sticking over time.
- While cleaning is recommended, do not use harsh chemicals. Opt for non-abrasive or mild cleaners.
- Try to keep a dry handle after the shower. Wipe down the moisture to avert water from pooling and causing corrosion.
- Be gentle when you are operating the handles.
- Always address other plumbing issues like unusual noises and fluctuating water pressure to reduce strain on the shower faucet.
- A regular professional inspection is inevitable. A periodic visit from your plumber can save you a lot of money in the future!
Importance of Regular Maintenance
All these tips may seem too many, but do you know why they are essential?
- Proper maintenance means a reduction in premature replacements.
- You will experience fewer leaks and drips.
- It also maintains functionality when kept clean, lubricated, and in good condition.
- You will save plenty on repair costs.
- It will improve water efficiency and contribute to conservation.
- Less unsafe incidents due to malfunctions.
- There will be fewer additional damages that can extend to other lines.
- Keeping it clean and functional preserves its visual appeal.
- You will have peace of mind at all times.
Can I Replace the Shower Handle Leaking with Any Brand?
When it comes to shower faucet handle replacement, you need to keep in mind a fistful of factors.
Significance of Compatibility
Although it is possible to replace an old handle with a new one from a different brand, be sure it is compatible with the existing one.
Check the measurements, specifications, and installation requirements of the new component before buying for proper fitment.
Quality and Sturdiness
Even if you have a preferred brand in mind, is it reliable? Quality and durability are of utmost importance to achieving long-term functionality.
So opt for a reputable brand that produces high-end products.
Valve Type
Ensure that the new cartridge or valve type is specifically designed for the type of shower handle you own.
Trim Style
This is when you plan to replace the handle as well. The trim style may be different than the older one or the overall set. The question is: can you relinquish aesthetic complement over functionality?
Warranty and Customer Support
Quality is of topmost value, as is the warranty and good customer support. This can be beneficial when encountering issues in the future or requiring assistance.
Frequently Asked Questions
1. Are there any DIY solutions to fix a shower handle leak?
Yes, you can retighten the loose screws or components, replace the valve stem or O-rings, and use the plumber’s tape to mitigate the thread stripping issue.
2. Can a worn-out O-ring cause a shower handle to leak?
It can certainly be one of the causes of shower handle leakage. Simply inspect them and replace them with new ones. Check the cartridge while you are at it.
If it looks damaged, you can buy the component instead, which comes with a set of new O-rings (depending on the handle style).
3. How can I repair a shower lever handle that is leaking water?
Start by turning off the main water supply. Then remove the handle, inspect the components (cartridge/valve stem, O-rings, etc.), replace the damaged parts, and reassemble everything.
I recommend checking out the in-depth instructions provided in the guide above.
Conclusion
The shower faucet leaking from handle can be an irritating itch that stays in your mind until it is fixed properly.
Mainly, regular maintenance plays a vital role in keeping that handle leak in check. Besides, if you address any problems and ensure compatible replacements, you will achieve that soothing shower condition we all hope for.
So, do not just stare at the trickles and wait for them to stain the tiles and the tub permanently. Seek out an expert’s assistance if this seems complicated. It is all about enjoying a worry-free shower that does not call for your attention.
![Water Still Flowing From Faucet While Using Shower [Solved]](https://faucetfam.com/wp-content/uploads/2023/06/Water-Still-Flowing-From-Faucet-While-Using-Shower-768x448.jpg)
![Single Handle Shower Faucet Is Hard to Turn Off [Solved]](https://faucetfam.com/wp-content/uploads/2023/06/Single-Handle-Shower-Faucet-Is-Hard-to-Turn-Off-768x448.jpg)