How To Replace Bathtub Faucet
Replacing your bathtub faucet might seem like a challenging job, but with the right approach, you can handle it confidently and efficiently. Whether your faucet is leaking, outdated, or simply not functioning as it should, swapping it out can refresh your bathroom’s look and improve its functionality. This guide walks you through every step, from the tools you’ll need to testing your new installation, so you can tackle this project yourself with ease and precision.
Tools And Materials Needed
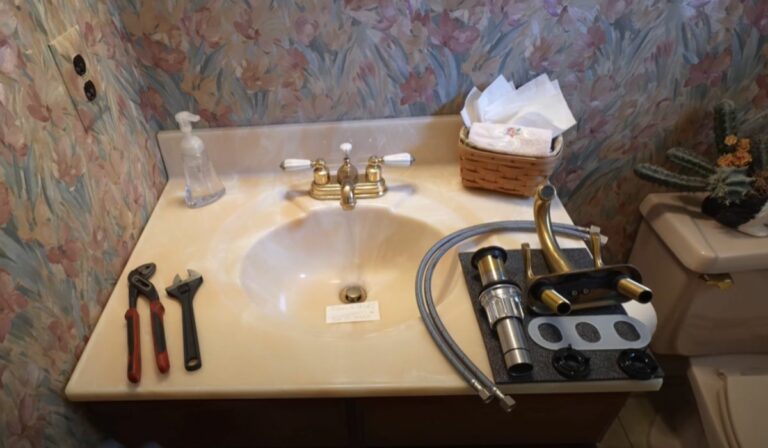
Before you begin, it’s crucial to gather all necessary tools and materials to ensure a smooth replacement process. Here’s what you’ll need:
- Adjustable wrench: For loosening and tightening nuts.
- Screwdriver (Phillips and flathead): Depending on your faucet’s screws.
- Plumber’s tape (Teflon tape): To seal threaded joints and prevent leaks.
- Bucket or towels: To catch any residual water that may drip.
- New bathtub faucet: Make sure it matches your’s existing configuration.
- Cleaning cloth: To wipe off debris and clean surfaces.
- Safety gloves and goggles: To protect your hands and eyes during the process.
Having everything at your fingertips will save time and reduce frustration during the replacement.
Preparing For Faucet Replacement
Preparation is key before you start dismantling your current setup.
Shut Off Water Supply
Locate the main water shutoff valve for your home or the specific valve for your bathroom. Turn it off completely to avoid unexpected water flow.
Drain Excess Water
Open the bathtub faucet to drain any leftover water from the pipes. Keep a bucket or towels handy to catch any drips.
Protect Surrounding Areas
Cover the tub and nearby fixtures with towels or plastic sheets to prevent damage or mess as you work.
Familiarize Yourself With Your Faucet Type
Knowing whether you have a single-handle, double-handle, or a shower diverter faucet can help you anticipate the removal and installation steps.
Step-By-Step Guide To Removing The Old Faucet
Now that you’re prepared, let’s jump into removing your old bathtub faucet:
- Remove Faucet Handles: Use a screwdriver or wrench to carefully unscrew the handles. Some may have decorative caps hiding screws.
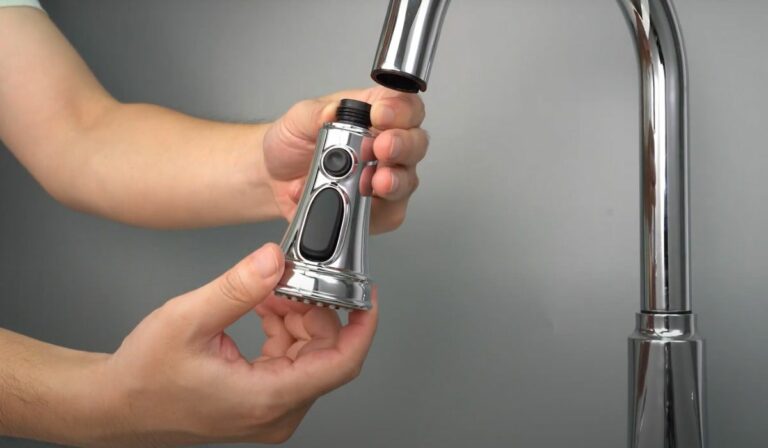
- Unscrew Faucet Spout: Depending on the model, this may either unscrew by hand, require an Allen wrench, or need a screwdriver. Turn counterclockwise gently.
- Detach Mounting Hardware: Behind the spout, there may be additional nuts or mounting brackets that need to be loosened.
- Clean the Area: Once the faucet is removed, clean off any old plumber’s putty, corrosion, or debris from the pipe threads or wall mounts.
Remember, apply steady but careful force to avoid damaging plumbing fixtures.
If at any point you encounter stubborn parts, a little penetrating oil can help loosen them.
Installing The New Bathtub Faucet
Installation is where your preparation pays off. Follow these steps to correctly install your new faucet:
- Apply Plumber’s Tape: Wrap Teflon tape clockwise around the threads of your supply pipe to ensure a watertight seal.
- Attach Faucet Spout: Screw the new spout onto the threaded pipe by hand, then use a wrench to tighten securely but avoid overtightening.
- Install Faucet Handles: Align and secure the handles according to manufacturer instructions. Ensure that they turn smoothly and are correctly oriented.
- Check Alignment and Mounting: Make sure the faucet is flush against the wall and properly mounted to avoid leaks or wobbling.
Keep the faucet manual nearby in case specific nuances apply to your model.
Testing And Troubleshooting
Once installed, it’s time to see your work in action:
- Turn On the Water Supply: Slowly open the shutoff valves.
- Check for Leaks: Monitor all joints and connections closely. If you spot any dripping, you may need to tighten fittings or reapply plumber’s tape.
- Test Water Flow and Temperature: Turn the handles to test hot and cold water flow and make sure everything operates smoothly.
If leaks persist, don’t hesitate to double-check the installation or consult troubleshooting tips provided by your faucet manufacturer. Sometimes small adjustments make a big difference.
In rare cases, if leak issues continue, it might be worth contacting a professional plumber to prevent water damage.
Tips For Maintaining Your Bathtub Faucet
To keep your new faucet working flawlessly and looking great longer, follow these maintenance tips:
- Clean regularly: Use a mild soap solution and soft cloth to clean the faucet to prevent mineral buildup.
- Avoid harsh chemicals: Steer clear of abrasive cleaners or scrubbers that can damage the finish.
- Check for leaks: Periodically inspect under the sink or behind faucet for drips or moisture.
- Operate handles gently: Avoid forcing handles to extend their life.
- Address minor issues promptly: Early repairs prevent expensive fixes later.
Routine care keeps your faucet efficient and your bathroom inviting.
Conclusion
Replacing your bathtub faucet is more approachable than it might seem at first glance. With the right tools, clear instructions, and a bit of patience, you can complete this upgrade yourself and enjoy the benefits of a refreshed, fully functional fixture. Not only will you save money on labor costs, but you’ll also gain confidence in handling future home improvement projects. Remember, preparation and attention to detail are your best allies in achieving a professional-quality faucet replacement that lasts.