How to Fix Shower Diverter in Wall: Mastering the Repair
Facing issues with a shower diverter is already frustrating. And to make it worse, you end up discovering that your shower actually has the diverter located behind the wall. This makes fixing the diverter complicated indeed.
Now you must find out exactly how to fix shower diverter in wall without causing extra issues.
To fix a shower diverter in the wall, you will need to cut open a hole into the wall to access the part. Then it requires inspecting the diverter for build-ups, leaks, and damaged washers. And in some cases, you will need to replace the shower diverter.
In this brief guide, I’ll tell you more about fixing the shower diverter installed in the wall and share some advice.
Fixing Shower Diverter in Wall – Why This Is Tricky!
To understand how to fix a shower diverter in a wall, you first need to realize this is not the same as handling a diverter attached to a spout or standalone diverters.
A shower diverter that is located in the wall will require you to open a section of that wall to access the parts. And that can be tricky. This is why resolving shower diverter issues also requires identifying the mechanism and type of shower diverter.
The Challenges You Are Likely to Face When Fixing a Shower Diverter in the Wall Are:
Identifying the Problem to Fix Shower Diverter in Wall
Clearly, accessing the diverter itself is difficult to have a look at it. So exactly how to diagnose a problem with the shower diverter in the wall that you cannot visibly see?
Well, getting a good grip on common shower diverter problems will help in such initial phases. Furthermore, you can tell what the problem is with the shower diverterby noticing some common issues with the shower system.
Some common problems with the shower diverter are loose screws on its plate, damaged parts, worn-out washers, and build-up.
Here Are a Few Shower Issues You Will Face When Some Diverter Problem Is Associated with It:
General Troubleshooting to Fix Shower Diverter in Wall
In the initial phases, it may not be clear what exactly the problem with the shower diverter is. And so, let’s move ahead with general troubleshooting and hope this fixes any minor inconvenience that might be causing problems.
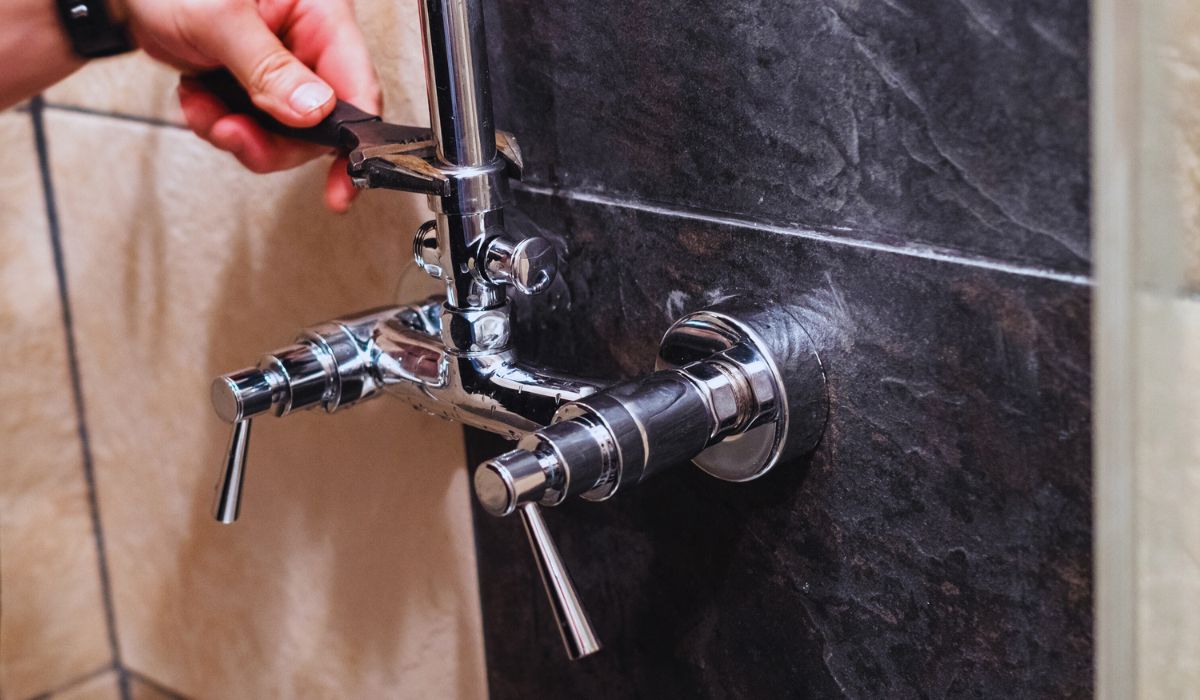
Accessing the Diverter Behind Wall
To start the process, you need to turn off the water supply to the shower system first. Now use a screwdriver to loosen the shower handle. You also want to take out any trim covering the valves. This may also require prying off these parts instead of using a screwdriver.
Some designs come with an escutcheon plate behind the trim and you need to remove it as well. At this point, the diverter valve should be visible. But since it’s behind the wall, you need to cut a hole for access. Before that, make sure you have checked for any available panels.
To cut a hole into the wall, you can use a reciprocating saw or a drywall saw. The size of the hole will actually depend on how much gap you need to easily work in that space.
Inspecting the Problem
You need a suitable socket for removing the diverter. Carefully unscrew it and then inspect the surrounding.
Look for:
If you discover that the shower diverter is not working and you cannot turn or pull it, then this can happen from build-up that needs cleaning.
By a Stuck Diverter, I Mean One or More of These:
Grease, lime scale, or dirt may have accumulated, causing a stuck diverter with these scenarios. To clean the area, you can use any regular toothbrush. For applying grease, go for the wire brush, as it makes the application easier.
Changing the washers or any damaged component requires you to buy a compatible replacement. In some cases, you may need to clean the washer if it looks undamaged but dirty from rust or build-up.
Avoid using any cleaning chemicals for this. Use a gentle soap and rinse the part under water. After cleaning, also apply some silicone grease to the washer. It’s also a great idea to replace the shower diverter washer every 5 to 6 years.
Installing a New Diverter
Now if this comes to a point where you can tell that the old diverter is damaged, consider changing it. You should know how to replace a faulty shower diverter in the wall before trying this.
Till now, you have gathered ideas on accessing the diverter. Now simply place a new compatible diverter in the spot and screw it with a screwdriver.
Finishing off
Once you are done with the task, patch the hole using joint compound or drywall. This will also require sanding and then painting over with the same paint color as its surrounding.
You also need to reassemble the escutcheon plate, trim, and handle the opposite manner of how you removed them. And finally, turn on the water supply to check if the problem is gone.
If you have a new diverter now, make sure you adapt proper maintenance of the shower system. Investing some thoughts on how to prevent issues with the shower diverter in the wall can prevent similar scenarios from happening again.
Signs that You Need to Replace the Shower Diverter Instead of Fixing It
I have listed down a few signs that are quite clear indicators that you need to change the shower diverter instead of putting effort into repairing it.
Wrapping Up
So now you have a good grip on how to fix shower diverter in wall. As you can see, due to the diverter being behind the wall it’s quite a challenging task that’s not meant for everyone.
So if you doubt a positive outcome from troubleshooting the diverter yourself, it’s best to call for help. You can always find a professional who can pay a visit to your place to inspect and offer a better, quicker fix to the diverter problem.
I will see you in my next guide soon. Take Care!
Facing issues with a shower diverter is already frustrating. And to make it worse, you end up discovering that your shower actually has the diverter located behind the wall. This makes fixing the diverter complicated indeed.
Now you must find out exactly how to fix shower diverter in wall without causing extra issues.
To fix a shower diverter in the wall, you will need to cut open a hole into the wall to access the part. Then it requires inspecting the diverter for build-ups, leaks, and damaged washers. And in some cases, you will need to replace the shower diverter.
In this brief guide, I’ll tell you more about fixing the shower diverter installed in the wall and share some advice.
Fixing Shower Diverter in Wall – Why This Is Tricky!
To understand how to fix a shower diverter in a wall, you first need to realize this is not the same as handling a diverter attached to a spout or standalone diverters.
A shower diverter that is located in the wall will require you to open a section of that wall to access the parts. And that can be tricky. This is why resolving shower diverter issues also requires identifying the mechanism and type of shower diverter.
The Challenges You Are Likely to Face When Fixing a Shower Diverter in the Wall Are:
Identifying the Problem to Fix Shower Diverter in Wall
Clearly, accessing the diverter itself is difficult to have a look at it. So exactly how to diagnose a problem with the shower diverter in the wall that you cannot visibly see?
Well, getting a good grip on common shower diverter problems will help in such initial phases. Furthermore, you can tell what the problem is with the shower diverterby noticing some common issues with the shower system.
Some common problems with the shower diverter are loose screws on its plate, damaged parts, worn-out washers, and build-up.
Here Are a Few Shower Issues You Will Face When Some Diverter Problem Is Associated with It:
General Troubleshooting to Fix Shower Diverter in Wall
In the initial phases, it may not be clear what exactly the problem with the shower diverter is. And so, let’s move ahead with general troubleshooting and hope this fixes any minor inconvenience that might be causing problems.
Accessing the Diverter Behind Wall
To start the process, you need to turn off the water supply to the shower system first. Now use a screwdriver to loosen the shower handle. You also want to take out any trim covering the valves. This may also require prying off these parts instead of using a screwdriver.
Some designs come with an escutcheon plate behind the trim and you need to remove it as well. At this point, the diverter valve should be visible. But since it’s behind the wall, you need to cut a hole for access. Before that, make sure you have checked for any available panels.
To cut a hole into the wall, you can use a reciprocating saw or a drywall saw. The size of the hole will actually depend on how much gap you need to easily work in that space.
Inspecting the Problem
You need a suitable socket for removing the diverter. Carefully unscrew it and then inspect the surrounding.
Look for:
If you discover that the shower diverter is not working and you cannot turn or pull it, then this can happen from build-up that needs cleaning.
By a Stuck Diverter, I Mean One or More of These:
Grease, lime scale, or dirt may have accumulated, causing a stuck diverter with these scenarios. To clean the area, you can use any regular toothbrush. For applying grease, go for the wire brush, as it makes the application easier.
Changing the washers or any damaged component requires you to buy a compatible replacement. In some cases, you may need to clean the washer if it looks undamaged but dirty from rust or build-up.
Avoid using any cleaning chemicals for this. Use a gentle soap and rinse the part under water. After cleaning, also apply some silicone grease to the washer. It’s also a great idea to replace the shower diverter washer every 5 to 6 years.
Installing a New Diverter
Now if this comes to a point where you can tell that the old diverter is damaged, consider changing it. You should know how to replace a faulty shower diverter in the wall before trying this.
Till now, you have gathered ideas on accessing the diverter. Now simply place a new compatible diverter in the spot and screw it with a screwdriver.
Finishing off
Once you are done with the task, patch the hole using joint compound or drywall. This will also require sanding and then painting over with the same paint color as its surrounding.
You also need to reassemble the escutcheon plate, trim, and handle the opposite manner of how you removed them. And finally, turn on the water supply to check if the problem is gone.
If you have a new diverter now, make sure you adapt proper maintenance of the shower system. Investing some thoughts on how to prevent issues with the shower diverter in the wall can prevent similar scenarios from happening again.
Signs that You Need to Replace the Shower Diverter Instead of Fixing It
I have listed down a few signs that are quite clear indicators that you need to change the shower diverter instead of putting effort into repairing it.
Wrapping Up
So now you have a good grip on how to fix shower diverter in wall. As you can see, due to the diverter being behind the wall it’s quite a challenging task that’s not meant for everyone.
So if you doubt a positive outcome from troubleshooting the diverter yourself, it’s best to call for help. You can always find a professional who can pay a visit to your place to inspect and offer a better, quicker fix to the diverter problem.
I will see you in my next guide soon. Take Care!

![Single Handle Shower Faucet No Hot Water [Troubleshooting Guide]](https://faucetfam.com/wp-content/uploads/2023/06/Single-Handle-Shower-Faucet-Has-No-Hot-Water-768x448.jpg)