How To Reattach A Delta Kitchen Faucet Sprayer Thumb Control
If you’ve ever used a Delta kitchen faucet with a sprayer thumb control, you know how convenient it is for multitasking in the kitchen. But when that thumb control detaches, it can put a real damper on your workflow. Luckily, reattaching the sprayer’s thumb control is usually straightforward, with the right knowledge, tools, and a little patience, you can have it functioning perfectly again in no time. This guide walks you through everything you need to confidently fix your Delta faucet sprayer thumb control.
Understanding The Components Of Your Delta Faucet Sprayer
Before diving into the reattachment process, it helps to understand the parts involved. Your Delta kitchen faucet sprayer typically consists of three main components related to the thumb control:
- Sprayer Head: This includes the nozzle where water expels.
- Thumb Control Lever: The small lever on the sprayer head that you press to activate the spray mode.
- Sprayer Hose: Connects the sprayer head to the faucet’s water supply.
The thumb control lever sits on the sprayer head and is connected internally by a simple mechanical assembly that allows you to toggle between stream and spray modes. Knowing these components will help you troubleshoot or identify if any part is damaged or missing during your repair.
Identifying Common Reasons The Thumb Control Detaches
Thumb controls on Delta kitchen faucets usually detach due to a handful of common causes:
- Wear and Tear: Over time, the plastic or metal clips that hold the lever can weaken or break.
- Excessive Force: Pushing or pulling the lever too hard can loosen or snap the attachment points.
- Improper Reassembly: Previous repairs or reinstallations that weren’t done correctly can lead to detachment.
- Debris or Mineral Build-Up: Dirt or mineral deposits can block the locking mechanisms, causing it to slip off.
Understanding why the thumb control detached will help you address the root cause and avoid repeat problems.
Tools And Materials Needed For Reattachment
Gathering the right tools before you start makes the job smoother. Here’s what you’ll want:
- Phillips and Flathead Screwdrivers: For removing any screws and prying gently if needed.
- Rubber Gloves: To protect your hands and improve grip.
- Flashlight: To see small components clearly inside tight spaces.
- Replacement Clips or Screws: Sometimes clips break: having spares can help.
- White Vinegar: To soak and remove mineral deposits if build-up is present.
- Soft Cloth or Sponge: For cleaning.
Having these ready will ensure you’re not scrambling mid-repair.
Step-By-Step Guide To Reattaching The Thumb Control
Preparing The Faucet Sprayer For Reattachment
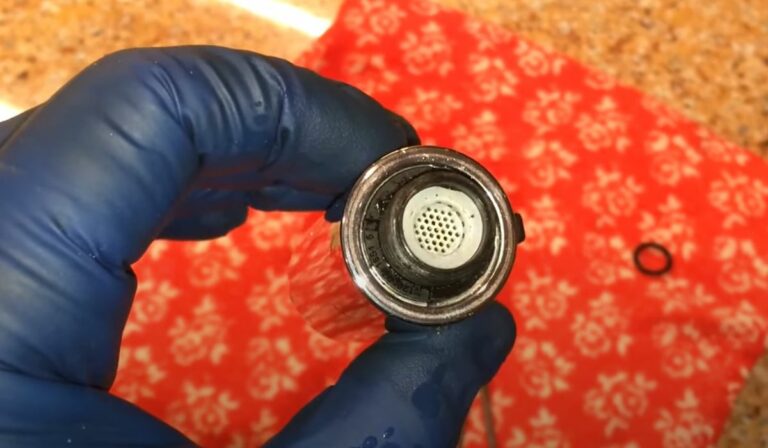
First, shut off the water supply to your faucet to prevent accidental sprays. Next, remove the sprayer head from the hose by unscrewing it gently. Clean both the sprayer head and the thumb control lever with a white vinegar soak to eliminate any mineral deposits or debris that could impede reattachment. Dry all parts thoroughly.
Aligning The Thumb Control Correctly
Inspect the thumb control lever and the sprayer head to identify the groove or notch corresponding to the attachment clips on the thumb control. Carefully position the lever so the clips line up snugly with the slots on the sprayer head. Take your time here, proper alignment is crucial for a secure fit.
Securing The Control To The Sprayer Hose
Once aligned, press the thumb control firmly onto the sprayer head until you hear or feel it click into place. If your model uses screws or additional clips, reinstall them now using your screwdriver, ensuring they are tight but not overtightened to avoid stripping. Then, reattach the sprayer head back onto the hose, making sure it’s threaded properly to prevent leaks.
Testing The Reattached Thumb Control For Functionality
After securing the thumb control, turn the water supply back on. Test the sprayer by pressing the thumb lever to activate the spray mode, check for smooth operation and no slipping. Run water through the sprayer hose while toggling the thumb control several times to ensure it consistently stays attached and functions as intended. If the thumb control feels loose or unresponsive, double-check your attachment steps.
Troubleshooting Tips If The Thumb Control Won’t Stay Attached
If you find that the thumb control won’t stay on even though following the previous steps, try these troubleshooting tips:
- Inspect for Broken Clips or Components: Damaged clips won’t hold the control. Replace them if necessary.
- Clean Out Debris Thoroughly: Sometimes hidden grit or mineral deposits prevent a secure lock.
- Apply a Small Amount of Water-Resistant Adhesive: As a last resort, a dab can hold the control, but only use this if replacement clips aren’t available.
- Verify Model Compatibility: Make sure you’re using the correct replacement parts for your Delta faucet model.
If issues persist, it might require deeper inspection or professional help.
Preventative Maintenance To Avoid Future Detachment
Keeping your thumb control secure longer involves some simple maintenance:
- Regular Cleaning: Wipe down the sprayer and thumb control weekly to prevent mineral build-up.
- Gentle Use: Avoid pressing the thumb control too hard or using excessive force.
- Periodic Inspection: Check clips and screws every few months for signs of wear or loosening.
- Use Water Softeners: If your tap water is hard, a softener reduces mineral accumulations that can impair components.
Practicing these habits can extend the life of your sprayer control and reduce headaches.
When To Contact A Professional Plumber
Sometimes, even though your best efforts, reattaching the thumb control isn’t enough to fix the problem. Consider calling a professional plumber if:
- The sprayer head or thumb control is cracked or severely damaged.
- You notice leaks that persist after reassembly.
- Internal faucet mechanisms seem broken or stiff beyond basic cleaning.
- You encounter difficulty in disassembling or reassembling without risking damage.
A licensed plumber can ensure your faucet sprayer is repaired safely and correctly, saving you time and potential frustration.
Conclusion
Reattaching your Delta kitchen faucet sprayer thumb control is a manageable task once you understand the components, use the right tools, and follow a careful step-by-step approach. By maintaining your sprayer and using it gently, you can keep it functioning smoothly for years. Should complications arise, don’t hesitate to bring in a professional, ensuring your kitchen remains fully functional and hassle-free. With these tips in hand, you’re well-equipped to tackle your sprayer repair confidently.