Fixing LED Faucet Light Not Working: Solutions and Tips!
Some owners find their kitchen or bathroom faucet’s LED lights stay on or off all the time. It basically occurs for different reasons based on the faucet light types.
Due to dirt on the aerator or damaged part, the self-powered LED faucet light stopped working. Usually, in battery-powered LED faucets, the same issue occurs because of misaligned batteries in the box, low-powered batteries, or disconnected/broken LED cables.
In order to fix the issue, I’ll break down the process along with some helpful details so you can follow up after knowing it all. Let’s Go!
How Does LED Faucet Light Work?
LED faucets can be of two kinds: one uses a generator and the other uses batteries. To learn more about how each type works, just keep reading!
Self Powered LED Faucet Light
Inside the LED faucet that doesn’t need batteries, there’s a tiny generator with a spinning part. This helps the faucet work by sensing the water moving and how warm or cold it is.
When you open the faucet for hot or cold water, the spinning part inside moves because of the water flow, and this makes the generator work.
Then, after a bit of time, the LED faucet lights up in red, green, or blue lights to show how warm or cold the water is.
Battery Powered LED Faucet
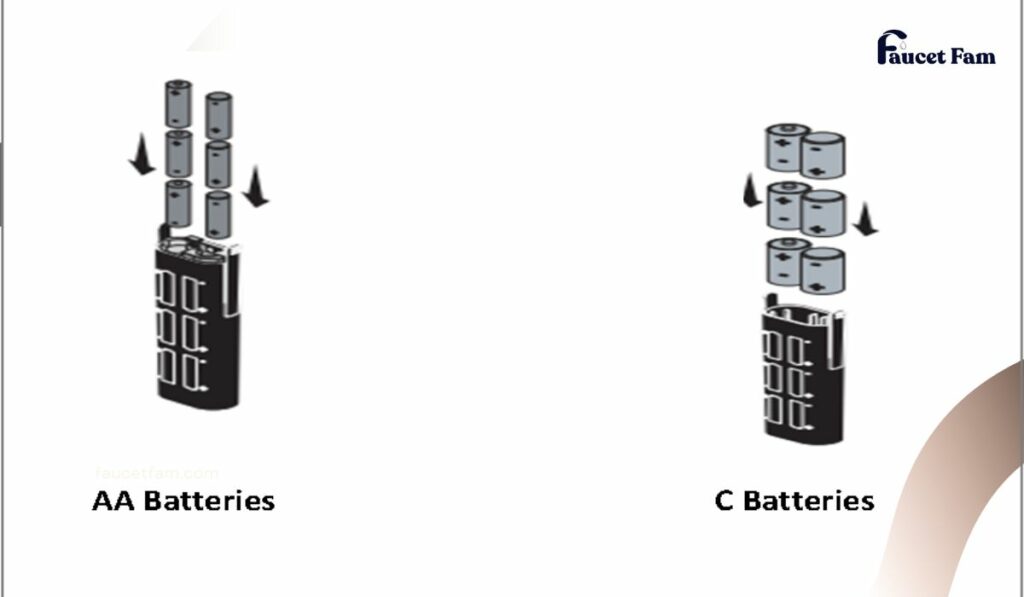
This type of LED faucet needs batteries to operate. In most cases, it uses either 4 – 6 AAA batteries or flat coin-like batteries stacked together.
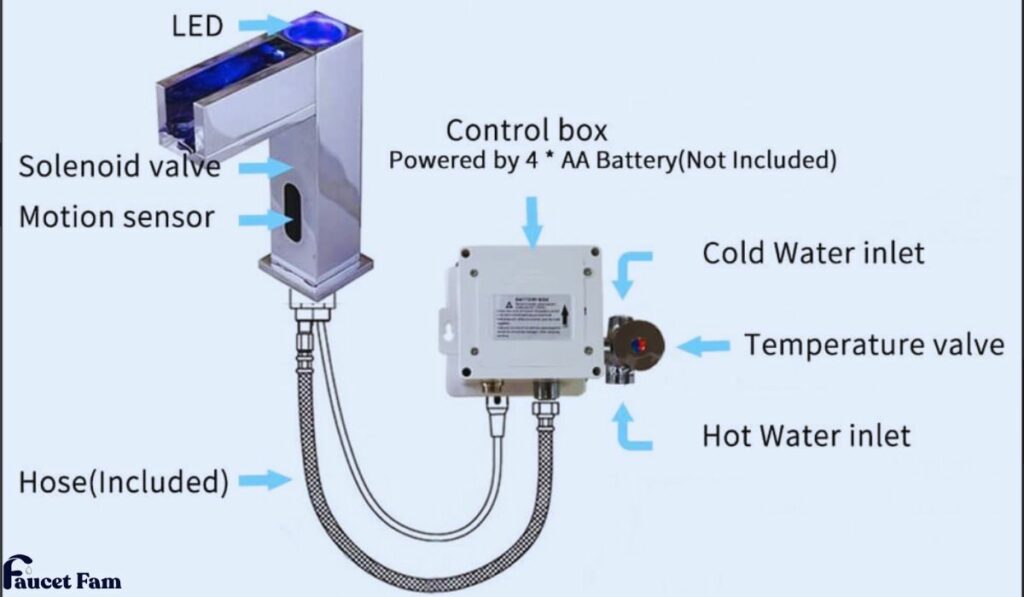
Image Credit: Archgo
These batteries make the LED light turn on and figure out how hot or cold the water is, so it can show different colors.
| For Your Information: The LED faucet light changes color based on the given temperature: Blue: Water temperature is lower than 0°C – 30°C (31°F – 86°F). Green: Water temperature is higher than 31°C (87.8°F) and lower than 40°C (104°F). Red: Water temperature is higher than 41°C – 80°C (104°F – 176°F). |
Common Causes of LED Faucet Light Issues!
There are some reasons why your LED faucet light stopped working by not lightening up. Let me share all the causes below:
For a Self-powered LED Faucet
1. Clogged Aerator
The dirt inside the plastic cap of the self-powered LED faucet can cause the light to not work at all. In that case, you’ll need to clean the aerator with a small brush or wire.
2. Bad LED Faucet’s Aerator
If the aerator seems decent with no dirt but still the light doesn’t work, it indicates the inner generator is at fault. To repair it, you’ll need to replace the LED faucet light or aerator which costs no more than $8 – $76 (at max).
For a Battery-powered LED Faucet
1. Batteries Inserted in Wrong Way
In battery-powered LED faucets, the light can stop operating when the batteries are attached in the incorrect direction. To fix it, you’ll need to insert the batteries in the right order
2. Dead Batteries
Sometimes it can happen if the batteries lose power or reach the limit. In this situation, just change them ASAP to resolve the bug.
| For Your Information: The 4 AAA or coin cells last no more than a year. However, if it’s C batteries, it’ll stand for about 2 to 3 years. |
3. Loose or Damaged LED Wire
Some folks tend to tie up the LED wire underneath the sink. Due to this, the LED wire can loosen up or get damaged causing the faucet light to not work. You can resolve the issue by connecting the LED wire correctly to the solenoid or replacing the part.
Solving LED Faucet Light Problems!
Now that you know what’s making the LED faucet light not work, it’s time to make it work again. Here’s how you can do it based on the causes:
Fix for a Self-powered LED Faucet
Step 1: Clean the Aerator
Start by filling some white or apple cider vinegar in a glass. Then, remove the aerator using your hand from the spout mouth. If it seems hard to remove, then twist it gently with an adjustable wrench.
Next, insert a solid wire through the plastic cap hole to separate all the inner parts. Then, dip them inside the glass filled with vinegar for 2 – 24 hours.
Afterward, pull out the aerator and wash it with clean water and rub its surface with a toothbrush. Lastly, reinsert it on the faucet.
Step 2: Change LED Faucet Light
For the LED faucet light replacement, you’ll need to get an adapter with the LED light to attach directly to the internal thread of the faucet.
Just twist the old aerator clockwise to remove it and then insert the new LED aerator. Be sure to check the size before purchasing the aerator. If the size seems bigger than the faucet thread then insert an adapter to fit the aerator easily.
Fix for Battery Powered LED Faucet
Step 1: Put Batteries in the Correct Order
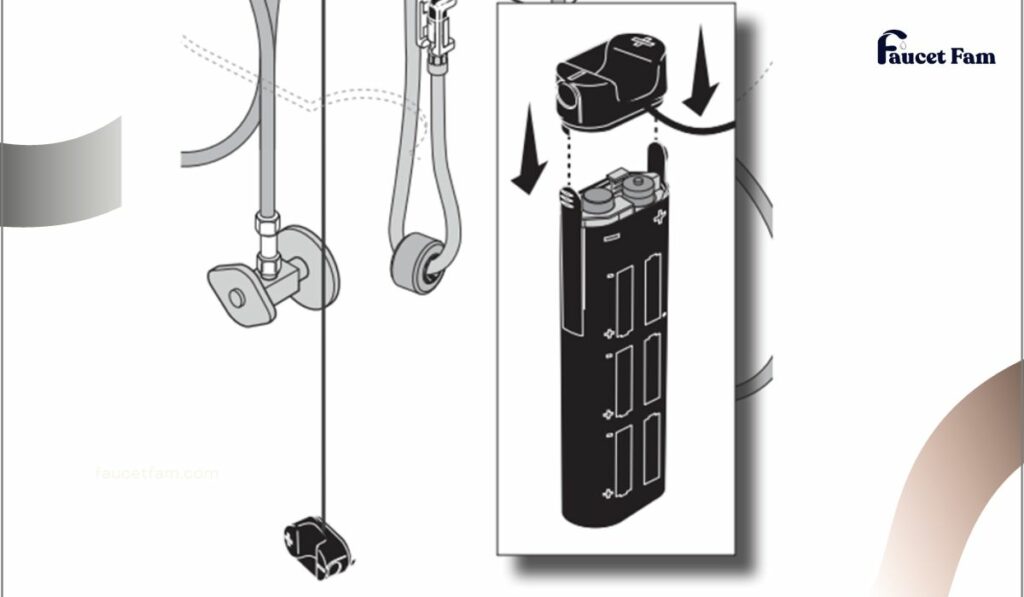
Underneath the sink, you’ll find the small black box that contains positive (+) and negative (–) signs. Next, open the box lid and you’ll find the batteries inside in total 4 – 6 (based on the brand and model).
Then, take out all the batteries and then reinsert all of them in the right order. Just follow the positive and negative signs when inserting the batteries.
Step 2: Replacing Batteries of LED Faucet
If the above solution doesn’t work, then remove all the batteries and organize them in a table. After that, bring the voltmeter or multimeter and twist its knob to select 15 – 20 DC voltage (V sign).
As all batteries of the LED faucet are rated 1.5V, the actual reading will be a little higher than this around 1.593V if the batteries are working. If not, you’ll see a low voltage of around 1.07V.
To use it, just place the red lead on the positive side of the battery and the black lead on the negative side of the battery. Then, check the readings of the battery to understand if it’s okay or not.
After that, use the load test to understand if the battery can be used or not. For that, set the knob to 1.5V for AA or C batteries. Then, place the black lead on the negative side of the battery and the red lead on the positive side of the battery.
If the batteries are good to use, it’ll show 4 milliamps. Or else, it’ll give lower milliamps on the load test’s screen. Based on this, replace the batteries and then check if the LED light works or not.
Step 3: Reconnect Or Change the LED Wire
Firstly, you’ll need to discover the LED wire that powers up the faucet light. In most cases, it is located inside the cabinet (if you have one) or underneath the sink.
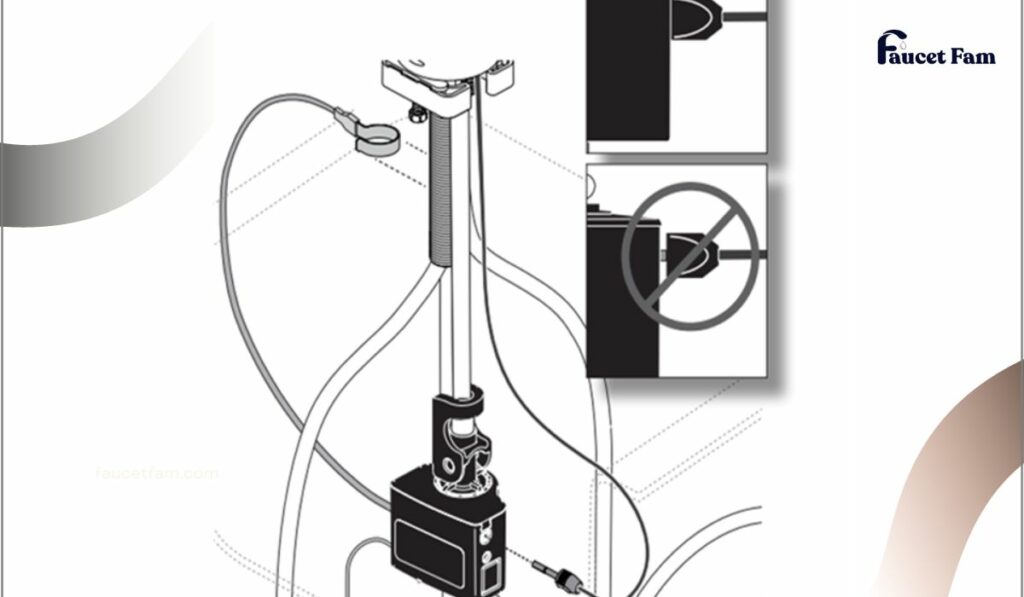
Find out the location of the sleek black LED wire. After finding it, unplug the wire and then push it tightly to the solenoid so that it sticks tightly. Be sure to check its condition to prepare for replacement.
Now, if the LED light stays on or stops illuminating, then it indicates the wire is damaged. In that case, you’ll need a replacement part for this from the same brand of faucet. Then, replace the wire with the solenoid part completely via an expert.
| Note: If your Glacier Bay faucet LED light is not working, be sure to fix it by checking the guide. |
Wrap Up
You should now fix the LED faucet light not working issue like the above methods after detecting the cause. It will take no more than 30 minutes to fix the bug (at max). So, be sure to try it yourself.
However, you should seek help from a skilled plumber if the issue is related to changing the whole faucet assembly or solenoid part. Hope you find this guide beneficial and informative to know something new.Now, if your house contains a vintage faucet that’s starting to not work, then check here to fix old-fashioned faucet issues.