Reasons Why a Kitchen Faucet Suddenly Stops Working
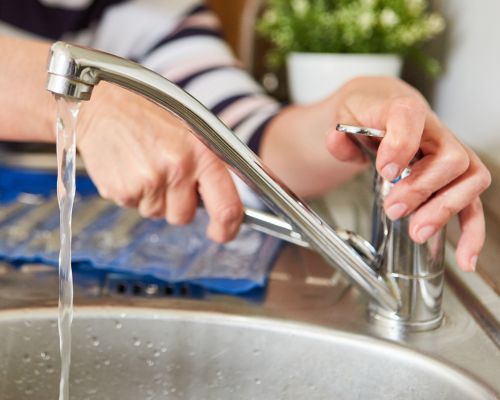
Most people get up in the morning as usual and go to the kitchen to make coffee. After grabbing the pot, they head to the faucet to fill it with water. But what if they discover that there is no water coming from the faucet? It is undoubtedly shocking.
They must be wondering what happened overnight because their faucet was fine during the night but stopped working during the day. There’re numerous causes for a faucet to stop working suddenly.
If you are one of those people, you have probably looked for the best article. Below, I’ve listed some possible causes for your kitchen faucet’s sudden stoppage. I hope that by the end of this article, you will have figured out why your faucet isn’t working.
Common Reasons Your Kitchen Faucet Stopped Working
When your faucet stops working, it’s crucial to identify the problem and fix it. Otherwise, the situation will worsen. The causes of single and double-handle kitchen faucets are nearly identical.
Check the Water Supply
The first thing you should check is your home’s water supply line. Examine other faucets in your home to see if water is flowing through them. If none of those faucets are working, there is a problem with the water supply.
In this case, if you have a neighbor, ask them if they are experiencing the same problem. If so, there is a problem with the water supplier and the main water line. Contacting the water supplier is required at this point.
On the other hand, if you find out the water is not coming from only your home, then your supplier may turn off the service for not paying the bill. Water will not flow from your faucet if your water main is not open. Make sure the water main is turned on by checking.
Check the Pipe
Another reason a faucet may not be working is a problem with the pipe. Numerous causes in the pipe prevent water from flowing through your faucet. They are either a frozen pipe, a leak in the plumbing pipe, or a clogged pipe.
Clogged Pipe
A clogged pipe will not allow your faucet to flow water. In addition, a leaky pipe would cause water to leak around the walls, preventing the faucet from working.
Clogged pipes may be the result of sediment accumulation, heavy metal deposits, and lime. If so, you should get in touch with a plumber so they can examine each section of the pipe and unclog the blockage.
Frozen Pipe
A frozen pipe freezes the water in the pipe, which stops the faucet from working. Your pipe might occasionally freeze if you live in a cold or subzero area. Examine the pipe to the faucet. If it’s frozen, try defrosting it with a hairdryer.
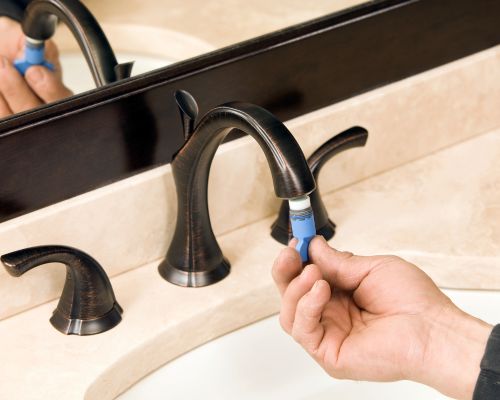
Check the Cartridge
Faucet cartridges can become clogged over time. It occurs when internal faucet parts such as cartridges and aerators become clogged with debris or minerals from the water.
So, when you notice no water coming from your faucet, check the cartridge. Clean up any debris you find. You can use a brush to clean the clogged cartridge or better replace it.
The typical lifespan of a faucet cartridge is 10 to 15 years. However, it doesn’t mean that the cartridge won’t malfunction before it. If the faucet cartridge malfunctions or becomes damaged, the user must replace the bad faucet cartridge.
And, I would like to inform you that sometimes the kitchen faucet won’t shut off due to a faulty cartridge. In addition, a faulty cartridge isn’t the only reason a for not turning off a faucet. Several causes occur in this problem, including a loose handle or damaged washer.
Steps for Replacing Kitchen Faucet Cartridge
Check the Aerators
Faucet aerators are screens that sit at the end of a faucet. Air can enter the water as it flows from the faucet due to the holes in the screens. Aerators’ screens minimize the amount of water that flows from a faucet.
However, over time debris buildup inside the aerators prevents a faucet from flowing water. Cleaning the aerator can solve this issue.
Steps for Fixing the Aerators Issue of Your Kitchen Faucet
Check the Faucet
Sometimes the kitchen faucet stopped working due to rust. Examine your faucet for rust. If there is rust on the outside of the faucet, there must be rust inside the faucet. In this case, you need to replace the faucet.
Check the Diverter
Most of the kitchen faucets are now in stream and sprayer mode. When you pull the sprayer trigger on your kitchen faucet, the diverter inside the faucet directs the water to the faucet sprayer.
If your kitchen faucet sprayer mode is not working, this could be happening due to a diverter issue. Replacing or cleaning the diverter can solve this issue. In most kitchen faucets, the water diverter is located near the front of the faucet body.
However, in some faucets, the diverter is located in the back. If you’re not sure where the diverter is, the sink manufacturer may have a kitchen sink diverter valve diagram that can help.
Steps for Fixing the Diverter Issue of Your Kitchen Faucet
For Single-Handle Kitchen Faucet
- Turn off the cold and hot water shut-off valves under the sink.
- Loosen the set screw on the bottom of a single faucet handle. Then take off the handle.
- Wrap a towel around the cap behind the spout. Using tongue-and-groove pliers, turn the cap in anticlockwise.
- Take off the cap to reveal the cam, packing, and ball assembly. Remove the cam from the faucet body. By doing this, you can remove the packing and ball assembly from the faucet body.
- Remove the spout from the faucet body by turning it back and forth. You can see the faucet diverter after taking the spout off.
- To remove the diverter from the faucet, insert a flathead screwdriver into the faucet body and apply pressure behind the diverter.
- Soak the diverter in a ¼ cup of white vinegar mixed with a ¼ cup of water for two hours.
- Next, insert the clean diverter into the faucet body. Then reinstall the faucet spout, ball assembly, and packing. Push the cam down to secure it on top of the ball assembly and packing.
- Put the faucet’s cap back. Reinstall the faucet handle and tighten the set screw to keep it in place.
For Double-Handle Kitchen Faucet
- Turn off the cold and hot water shut-off valves under the sink.
- Wrap a towel around the cap behind the spout. Turn the cap counterclockwise with tongue-and-groove pliers. To see the diverter’s top, remove the cap.
- Put a butter knife or a nickel into the top slot of the diverter. To remove the diverter from the faucet’s body, turn it counterclockwise.
- Use needle-nose pliers to remove the sink faucet diverter valve from the faucet body hole.
- Soak the diverter in a ¼ cup of white vinegar mixed with a ¼ cup of water for two hours.
- Clean the area on the faucet body where the diverter sits with a small brush to remove any deposits or blockages.
- Place the diverter inside the faucet body. Turn the diverter clockwise to tighten it with a butter knife or nickel.
- Put the cap on the faucet’s body and cover it with a towel. Then tighten it using the pliers.
Compared to single kitchen faucets, determining the problem with a double kitchen faucet is more difficult. When your double kitchen faucet is not working, turn both handles to see if the faucet is working or not.
After turning them on, if the faucet still does not function, there is a problem with the supply line, or the pipe is blocked or frozen. The aerator may also have debris on it, which could be the cause of the faucet not working.
On the other hand, if you discover that one side of the handle is operating while the other side is not, then one of the handle’s cartridges or diverters is damaged. They need to be changed.
Overall, you do not have to replace both side handle cartridges or the diverter of a double-handle kitchen faucet. You should only replace the one whose side is malfunctioning. Follow the steps below to discover what’s wrong with your faucet that stops it from working.
Final Words
Do not panic if you discover that your kitchen faucet has suddenly stopped working. First, make sure that every faucet in your house is functional.
Check the pipe and cartridge aerators of your kitchen faucet if you discover that every other faucet in the house functions properly. Afterward, change them out or clean them as needed. Finally, if none of the aforementioned items are problematic, you could replace the faucet. Remember before performing any maintenance, remember to shut off both the hot and cold-water valves on the kitchen faucet located under the sink.