How to Stop a Dripping Shower Faucet
To stop a dripping shower faucet, first identify the type you have—single or dual handle—and gather tools like screwdrivers and replacement washers or cartridges. Turn off your water supply completely and open the faucet to drain any leftover water. Carefully remove the handle and inspect internal parts like O-rings or cartridges for damage. Replace any worn components, reassemble everything tightly but gently, then turn the water back on and check for leaks. Keep going if you want to ensure a thorough fix.
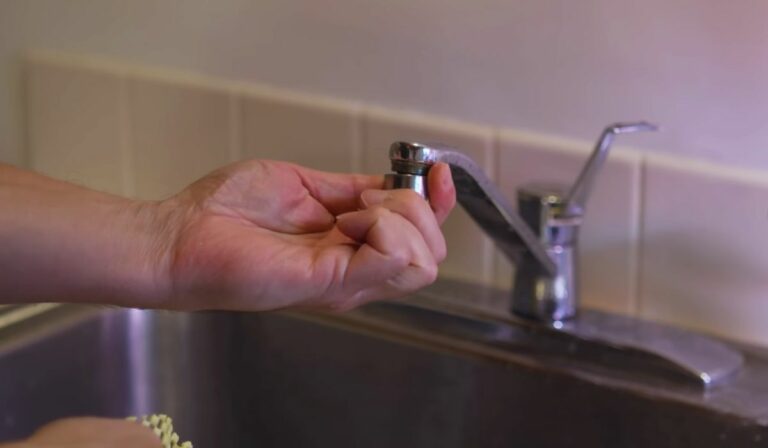
Identify the Type of Shower Faucet
How do you know which type of shower faucet you have? Start by taking a close look at your faucet handle(s). If you see one handle that moves up and down or side to side, you likely have a single-handle faucet. Two handles turning independently usually indicate a dual-handle faucet.
Next, check if your faucet uses a cartridge, ball, compression, or ceramic disc mechanism by removing the handle and inspecting inside. Cartridge faucets have a cylindrical valve, ball faucets feature a ball-shaped mechanism, compression faucets use separate hot and cold valves, and ceramic disc faucets contain two smooth discs.
Identifying the type precisely helps you target the right repair approach. Remember, knowing your faucet type saves time and ensures you replace or fix the correct parts.
Gather the Necessary Tools and Materials
Once you’ve identified the type of shower faucet you have, gathering the right tools and materials will make the repair process smoother. You’ll typically need a flathead and Phillips screwdriver to remove the faucet handle and access internal parts.
An adjustable wrench or a set of pliers will help loosen nuts and bolts. It’s smart to have replacement parts like O-rings, washers, or cartridges on hand, depending on your faucet type. A plumber’s grease will lubricate these parts during reassembly.
Also, grab a clean cloth to wipe away debris and a small container to keep screws organized. Having everything ready before you start saves time and avoids interruptions during your repair.
Turn Off the Water Supply
Before you start working on your shower faucet, make sure you turn off the water supply to prevent any leaks or water damage. Locate the main water shutoff valve for your home, which is usually near the water meter or where the main line enters your house. Turn the valve clockwise until it stops to shut off the water.
If your shower has a local shutoff valve, use that instead for a quicker process.
After turning off the water, open the shower faucet to drain any remaining water in the pipes. This step reduces pressure and prevents unexpected water flow while you work.
Double-check that the water is fully off before proceeding to avoid complications during the repair.
Disassemble the Faucet and Inspect Components
After you’ve confirmed the water supply is completely shut off and the faucet is drained, you can start taking the faucet apart. Begin by removing the handle—usually secured by a screw hidden under a decorative cap. Use a screwdriver or Allen wrench to loosen it, then gently pull the handle off.
Next, take off the escutcheon plate, if there’s one, to expose the valve assembly. Carefully unscrew the valve stem or cartridge, noting its orientation for reassembly.
Once removed, inspect the valve seat, O-rings, washers, and cartridge for any signs of wear, cracks, or mineral buildup. Pay close attention to these components, as damaged parts often cause leaks.
Keep track of all parts and their order to make reassembly easier later on.
Replace Worn Parts and Reassemble the Faucet
If you find any worn or damaged parts during your inspection, replace them with exact matches from a hardware store or the faucet manufacturer. This ensures a proper fit and prevents future leaks.
Start by installing the new washers, O-rings, or cartridges in the correct order. Align all components as they were originally positioned.
When reassembling, tighten screws and nuts securely but avoid overtightening to prevent damage.
Reattach the faucet handle and any decorative caps.
Turn the water supply back on slowly and test the faucet by turning it on and off. Check carefully for any signs of dripping or leaks.
If everything is dry and functioning smoothly, you’ve successfully stopped the drip and restored your shower faucet.
Frequently Asked Questions
How Much Does It Cost to Hire a Plumber for This Repair?
You’ll typically pay between $100 and $200 to hire a plumber for this repair, depending on your location and the complexity. Don’t forget, some plumbers charge by the hour, usually $45 to $150.
Can a Dripping Faucet Increase My Water Bill Significantly?
Yes, a dripping faucet can increase your water bill significantly over time. Even small drips waste gallons daily, so fixing it promptly helps you save money and conserve water effectively. Don’t ignore those leaks!
Are There Eco-Friendly Faucets That Prevent Dripping?
Yes, you’ll find eco-friendly faucets designed to prevent dripping by using advanced seals and pressure regulation. These faucets save water, reduce waste, and lower bills, so choosing one helps you protect the environment efficiently.
How Often Should I Maintain My Shower Faucet to Avoid Drips?
You should maintain your shower faucet every six months to avoid drips. Regularly check seals and washers, clean mineral buildup, and tighten parts. This proactive care helps prevent leaks and extends your faucet’s lifespan.
What Health Risks Are Associated With a Leaking Shower Faucet?
You risk mold growth, which can trigger allergies and respiratory issues. Constant moisture also promotes bacteria, potentially causing infections. Fix that leak quickly to keep your bathroom healthy and avoid costly health problems down the line.
Conclusion
Now that you know how to stop a dripping shower faucet, you can save water and avoid annoying leaks. Just identify your faucet type, gather your tools, and turn off the water supply before you start. Carefully disassemble the faucet to inspect and replace any worn parts. Once you put everything back together, you’ll enjoy a drip-free shower in no time. Taking these simple steps keeps your bathroom running smoothly and prevents costly damage.