How to Install Shower Door Bottom Seal
To install a shower door bottom seal, first remove the old seal carefully to avoid damaging the door. Measure the width precisely to get a snug fit. Choose a replacement seal that matches your door’s profile and material preferences. Clean and dry the door edge thoroughly so the new seal adheres well. Cut the new seal to size and attach it firmly along the bottom edge. Proper installation helps prevent leaks and keeps your shower clean. Keep going to find out more about each step for a perfect fit.
Tools and Materials Needed
Before you begin installing the shower door bottom seal, gather all the necessary tools and materials to ensure a smooth process. You’ll need a new shower door bottom seal designed to fit your door’s dimensions.
Grab a measuring tape to confirm the length, a utility knife or scissors for trimming the seal, and a flathead screwdriver if your door frame has clips or screws securing the old seal.
Keep a cleaning cloth and rubbing alcohol handy to prepare the door surface before installation.
If the seal requires adhesive, make sure you have waterproof silicone sealant or the recommended glue.
Having these items ready prevents interruptions and helps you install the seal efficiently, ensuring a watertight, secure fit that keeps your bathroom dry.
Removing the Old Shower Door Seal
When you’re ready to remove the old shower door seal, start by gently pulling it away from the door frame to loosen any adhesive or clips holding it in place.
If it resists, use a plastic scraper or putty knife to carefully pry it off without damaging the door.
For any stubborn adhesive residue, apply a bit of rubbing alcohol or adhesive remover and let it sit for a few minutes before wiping it away.
Be sure to remove all old seal material and residue to ensure the new seal adheres properly.
Take your time to avoid scratching the glass or frame.
Once the old seal is fully removed and the surface is clean and dry, you’re set for the next step in installing your new shower door bottom seal.
Measuring the Shower Door Width
To measure the shower door width accurately, grab a tape measure and note the distance at the bottom edge where the new seal will attach.
Make sure the tape measure is straight and flush against the edge to avoid any gaps that could lead to incorrect measurements.
Measure from one end of the door to the other, focusing solely on the bottom part where the seal will fit.
If the door has any curves or irregularities, measure the straight sections separately and use the longest measurement.
Double-check your numbers to ensure precision—accurate measurements are crucial for a snug fit.
Jot down the width clearly; this will guide you when selecting and cutting the replacement seal, ensuring it fits perfectly without gaps or overlaps.
Choosing the Right Replacement Seal
Since a proper seal prevents water leaks and drafts, choosing the right replacement seal is essential for your shower door’s performance. First, identify the type of seal your door requires—whether it’s a sweep, drip rail, or a full bottom seal.
Check the material, too; vinyl and silicone are popular for their durability and flexibility. Measure the thickness and length accurately to ensure a snug fit.
Consider the door’s design—frameless doors often need different seals than framed ones. Don’t forget to match the seal’s profile with your door edge to avoid gaps.
Finally, pick a seal that’s easy to install and maintain. By selecting the correct replacement seal, you’ll keep your bathroom dry and extend your shower door’s lifespan.
Preparing the Shower Door for Installation
Before installing the new shower door bottom seal, you’ll want to thoroughly clean and dry the door edge to ensure proper adhesion and fit. Use a mild cleaner or rubbing alcohol to remove soap scum, dirt, and old adhesive residue.
Wipe the area dry with a clean cloth to prevent moisture from interfering with the seal. Check the door edge for any damage or rough spots that could prevent a tight fit. If you find any, gently sand the area smooth and clean again.
Make sure the door is stable and positioned properly in its frame before proceeding. Taking these preparation steps will help your new seal adhere better and last longer, ensuring a neat, watertight finish.
Cutting the New Seal to Size
Although the new shower door bottom seal comes in standard lengths, you’ll need to cut it to fit your door precisely. Start by measuring the width of your shower door’s bottom edge with a tape measure. Mark the exact length on the seal using a permanent marker or pencil.
Use sharp scissors or a utility knife to make a clean, straight cut along the mark. Avoid jagged or angled cuts, as these can affect the seal’s effectiveness. Double-check your measurement before cutting to prevent mistakes.
If the seal has a bulb or fin, ensure the cut maintains the shape for a proper fit. Taking your time here guarantees a snug, leak-free installation without wasting material.
Attaching the Seal to the Shower Door
Once you’ve cut the seal to the right size, you’ll need to firmly press it onto the bottom edge of your shower door. Start at one corner, aligning the seal so it fits snugly without gaps.
Slowly work your way along the door’s bottom, applying steady pressure to ensure the seal adheres properly. If your seal has a groove or channel, slide it over the door edge carefully, making sure it’s fully seated.
Avoid stretching the seal, as this can cause it to pull away or warp. Use your fingers or a soft tool to smooth out any bubbles or wrinkles.
Finally, trim any excess material if needed to maintain a clean, seamless fit along the entire length of the door.
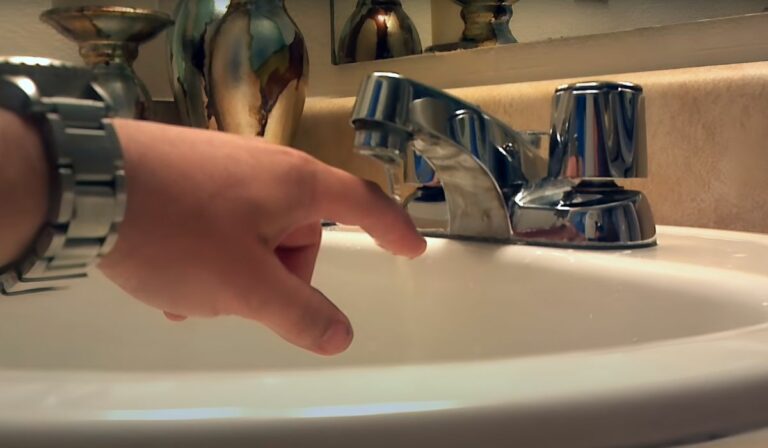
Testing the New Shower Door Bottom Seal
How can you be sure your new shower door bottom seal is working effectively? Start by closing the shower door firmly and checking for any visible gaps between the seal and the shower floor or threshold.
Next, run water over the door area and watch closely to see if any leaks appear outside the enclosure. If water escapes, adjust the seal by repositioning or trimming it slightly for a better fit.
Also, ensure the seal moves smoothly with the door without catching or bending. Finally, inspect the seal’s contact with the shower surface—it should create a snug, continuous barrier.
Testing now saves you from water damage later, so take a few minutes to confirm your installation is tight and secure before finishing up.
Frequently Asked Questions
How Long Does a Shower Door Bottom Seal Typically Last?
You can expect a shower door bottom seal to last about 1 to 3 years, depending on usage and water exposure. Regular cleaning and prompt replacement prevent leaks and mold, keeping your shower door efficient and fresh.
Can I Use a Silicone Sealant Instead of a Bottom Seal?
You can use silicone sealant, but it’s not a perfect replacement for a bottom seal. Silicone stops leaks temporarily, but a bottom seal provides better water containment and durability for your shower door in the long run.
Will a Bottom Seal Prevent All Water Leaks?
No, a bottom seal won’t prevent all water leaks. It helps reduce splashes but won’t stop water from escaping if the door isn’t properly aligned or if other seals are damaged. Regular maintenance is key.
How Often Should I Clean the Shower Door Bottom Seal?
You should clean your shower door bottom seal at least once a week to prevent mold, mildew, and soap buildup. Regular cleaning keeps it effective and extends its lifespan, so don’t skip this simple maintenance step.
Can a Bottom Seal Be Used on Curved Shower Doors?
Yes, you can use a bottom seal on curved shower doors, but you’ll need a flexible, bendable seal designed for curves. Make sure it fits snugly to prevent leaks and adjust it carefully to match the door’s shape.
Conclusion
Now that you’ve installed your new shower door bottom seal, you’ll notice a big difference in preventing water leaks. By carefully measuring, cutting, and attaching the seal, you’ve ensured a snug fit that keeps your bathroom dry. Remember to test it thoroughly and make any small adjustments if needed. With just a bit of effort, you’ve extended your shower door’s life and improved your bathroom’s cleanliness and comfort. Great job!