How to Install a Wash Hand Basin
To install a wash hand basin, first choose a basin that fits your space and gather essential tools like a drill and plumber’s tape. Clear the area, mark plumbing points, and ensure the wall is stable. Mount the basin securely with screws and brackets, then connect the water supply lines using plumber’s tape to prevent leaks. Finally, attach the drain assembly, including the P-trap, checking for leaks. Following these basics sets you up to handle the full installation confidently.
Selecting the Right Wash Hand Basin and Tools
Before you begin installing your wash hand basin, it’s important to choose one that fits both your space and needs. Measure the area carefully to ensure your basin won’t overcrowd the room or feel too small. Consider the style—wall-mounted, pedestal, or countertop—based on your bathroom’s layout and your personal preference.
Don’t forget to check the basin’s depth and width to match your comfort and usability requirements. Next, gather the right tools: a drill, adjustable wrench, spirit level, screwdriver, plumber’s tape, and sealant.
Having these on hand will make the installation smoother and quicker. Selecting the appropriate basin and tools upfront sets a solid foundation for a successful, hassle-free installation.
Preparing the Installation Area
Once you’ve selected the right basin and gathered your tools, focus on preparing the installation area. Begin by clearing the space where the basin will go, removing any old fixtures or debris.
Check the wall surface for stability; it must support the basin’s weight. Repair any cracks or weak spots to ensure a secure mount.
Next, locate and mark the plumbing connections—both water supply and waste pipes—making sure they align with your new basin’s fittings. If needed, adjust the pipe positions or install new connectors.
Finally, measure and mark the exact height and position of the basin on the wall, using a level to guarantee it’s straight.
Taking these steps carefully sets you up for a smooth installation process.
Mounting the Wash Hand Basin
Although you’ve prepared the area thoroughly, mounting the wash hand basin requires careful alignment and secure fixing.
Begin by holding the basin against the wall at the marked height. Use a spirit level to ensure it’s perfectly horizontal. Mark the drilling points through the basin’s mounting holes.
Next, drill the holes into the wall using an appropriate masonry bit. Insert wall plugs to provide a firm anchor for the screws.
Secure the basin with screws, tightening them evenly to avoid cracks. If your basin includes brackets, attach them to the wall before placing the basin onto them.
Double-check the basin’s stability by gently pressing on its edges. Proper mounting prevents movement and ensures long-term durability.
Once mounted securely, you’re ready to proceed to the next step.
Connecting the Water Supply Lines
How do you ensure a secure connection for your wash hand basin’s water supply lines? First, turn off the main water supply to prevent leaks. Locate the hot and cold water valves beneath the basin. Attach flexible supply lines to these valves, making sure you connect hot water to the hot valve and cold water to the cold valve.
Use plumber’s tape on threaded connections to create a watertight seal. Hand-tighten the connectors, then finish tightening with a wrench—don’t overtighten, or you risk damaging the fittings. Once connected, turn the main water supply back on and check carefully for leaks.
If you spot any drips, tighten the connections slightly until the leak stops. This ensures your basin receives a reliable water flow without any issues.
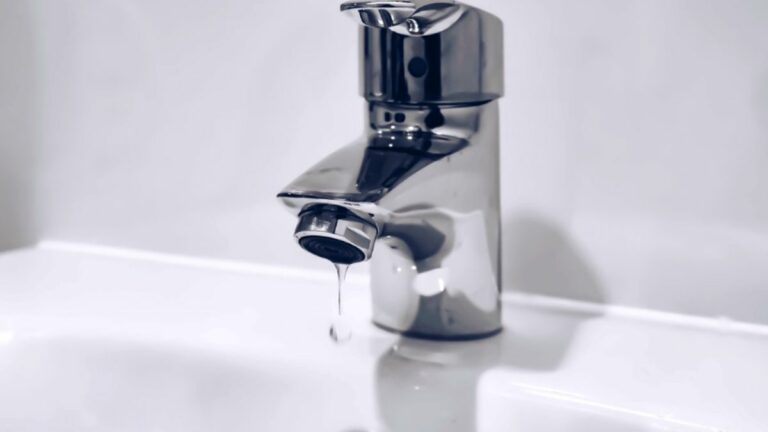
Installing the Drainage System
After securing the water supply lines and confirming there are no leaks, you can move on to installing the drainage system. Start by attaching the basin’s drain assembly to the sink’s drain hole, ensuring you use plumber’s putty or silicone to create a watertight seal.
Next, connect the trap adapter to the drain pipe beneath the basin. Fit the P-trap onto the trap adapter and align it with the wall drain pipe. Tighten all slip nuts by hand, then give them a slight turn with pliers—don’t overtighten to avoid damage.
Finally, run water through the basin and check all joints for leaks. If you spot any, tighten connections slightly or reseal as needed. This ensures proper drainage and prevents water damage.
Frequently Asked Questions
How Do I Choose the Best Material for My Wash Hand Basin?
You should pick a basin material based on durability, style, and maintenance. Porcelain’s classic and easy to clean, while stainless steel is tough. Consider your bathroom’s look and how much upkeep you’re willing to do.
What Maintenance Tips Can Prolong the Basin’s Lifespan?
You should clean your basin regularly with mild soap, avoid harsh chemicals, fix leaks promptly, and prevent clogs by using strainers. Also, wipe it dry after use to stop water stains and maintain its shine longer.
Can I Install a Wash Hand Basin Without Professional Help?
Yes, you can install a wash hand basin yourself if you have basic plumbing skills and tools. Just follow clear instructions carefully, turn off the water supply, and double-check all connections to avoid leaks or damage.
What Are Common Problems After Installation and How to Fix Them?
Common problems include leaks, poor drainage, and loose fittings. You’ll want to tighten connections, clear blockages with a plunger, and reseal joints with plumber’s putty or silicone to fix these issues quickly and effectively.
Are There Water-Saving Features Available for Wash Hand Basins?
Yes, you can find water-saving features like aerators, flow restrictors, and sensor taps for wash hand basins. These help you cut water usage without sacrificing performance, saving both water and money over time.
Conclusion
Now that you’ve selected the right basin and gathered your tools, preparing your installation area sets you up for success. Mount your wash hand basin securely, then connect the water supply lines carefully to avoid leaks. Finally, install the drainage system to ensure proper water flow. By following these steps, you’ll have a fully functional and stylish wash hand basin ready to use in no time. Don’t forget to double-check all connections for safety!