How To Fix A Bathtub Faucet That Drips
A dripping bathtub faucet might seem like a small annoyance, but over time, those constant drops can waste a surprising amount of water and inflate your utility bills. Tackling the problem yourself not only saves money but also empowers you with basic home maintenance skills. In this guide, you’ll learn how to identify the cause behind your leaking faucet and fix it confidently using straightforward steps and essential tools.
Identifying The Cause Of The Drip
Before you jump into repairs, pinpointing the exact reason your bathtub faucet is dripping is crucial. The drip usually results from worn-out components such as washers, O-rings, or issues with the valve seat. Over time, minerals from hard water can corrode or damage these parts, causing leaks. Sometimes, the faucet handle might be loose or the cartridge inside improperly seated. Observing the drip pattern, whether it’s constant or intermittent, can also hint at the culprit. Recognizing the cause early ensures you apply the right fix without unnecessary replacements.
Tools And Materials You Will Need
Having the right tools at hand makes repairing a dripping faucet much smoother. Here’s what you’ll typically need:
- Adjustable wrench: For loosening and tightening nuts.
- Screwdrivers (flathead and Phillips): To remove faucet handles and other screws.
- Replacement washers and O-rings: Usually available at hardware stores: make sure to take the old ones for comparison.
- Plumber’s grease: To lubricate parts and prevent wear.
- Cleaning brush or cloth: For scrubbing away mineral deposits.
- Vinegar or commercial calcium remover: To dissolve hard water buildup if necessary.
Gathering these materials before you start will save you multiple trips to the store.
Step-By-Step Guide To Fixing The Dripping Faucet
Removing The Faucet Handle Safely
Start by shutting off the water supply to the tub to avoid any unexpected sprays. Use a screwdriver to remove the decorative cap on the handle, then unscrew the handle itself. If it’s stuck, a gentle tap with a rubber mallet or a bit of penetrating oil can help loosen it.
Inspecting And Replacing Washers Or O-Rings
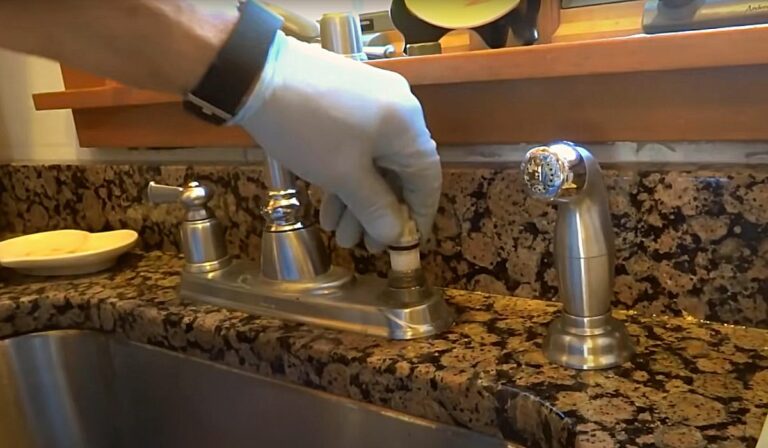
Once the handle is off, you’ll see the stem assembly. Remove it using an adjustable wrench. Inspect the washers and O-rings carefully. If they appear cracked, hardened, or worn, replace them with exact matches. Applying plumber’s grease before reassembly keeps them supple and seals better.
Checking And Cleaning The Valve Seat
The valve seat connects the faucet to the plumbing and can get corroded or clogged with mineral deposits causing leaks. Use a seat wrench or screwdriver to remove it. If damaged, it might need replacing or resurfacing. Clean any buildup with vinegar or a commercial cleaner, scrubbing gently to avoid scratches that cause leaks.
Reassembling The Faucet Correctly
After replacing and cleaning the parts, reassemble the faucet in reverse order. Ensure each component fits snugly without forcing, as overtightening can damage seals or strip threads. Once everything is back in place, turn on the water supply and test the faucet. Watch closely for drips or leaks around the handle and spout. If the drip persists, double-check your work or consider inspecting other components like the cartridge or valve body.
Preventative Tips To Avoid Future Drips
Fixing a faucet is rewarding, but preventing future leaks prolongs its life and keeps your bathroom dry. Here are some tips:
- Turn off faucets gently to avoid damaging washers.
- Periodically clean faucet aerators and valve seats to prevent buildup.
- Use water softeners if your home has hard water, reducing mineral deposits.
- Schedule routine plumbing checks every few years.
- Replace washers and O-rings at the first sign of wear rather than waiting for a leak.
These small steps help maintain your fixtures and save money in the long run.
When To Call A Professional Plumber
While many faucet drips you can fix yourself, some situations call for a plumber’s expertise. Consider professional help if:
- The drip continues after replacing washers and cleaning.
- You notice corrosion inside the valve body or extensive plumbing damage.
- The faucet assembly is unfamiliar or uses specialized cartridges.
- You lack essential tools or confidence in handling plumbing repairs.
- Your home’s plumbing is outdated, requiring more complex interventions.
An experienced plumber can diagnose hidden issues and provide lasting repairs, saving you frustration and water waste.
Conclusion
A dripping bathtub faucet shouldn’t derail your day or drain your wallet. With a little patience, the right tools, and this straightforward guide, you can tackle the most common causes of leaks yourself. Identifying and replacing worn washers or O-rings, cleaning the valve seat, and reassembling the faucet properly will usually stop those annoying drips. And remember, staying proactive with maintenance goes a long way in preventing future leaks. If you ever feel stuck, a professional plumber is just a call away, ready to ensure your bathroom stays leak-free and worry-free.

