How to Clean Shower Walls
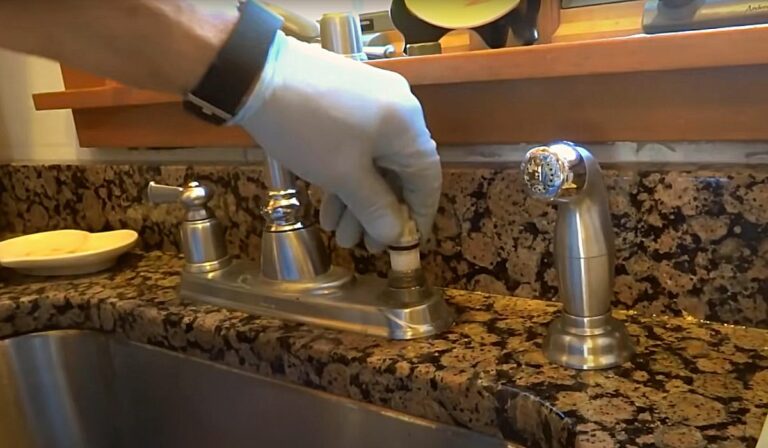
To clean your shower walls, gather a scrub brush, gloves, and a suitable cleaner like a vinegar-water mix for tiles or a pH-neutral option for stone. Remove items, rinse walls, then spray the cleaner evenly from top to bottom. Let it sit, scrub gently focusing on grout and corners, then rinse thoroughly. Dry with a microfiber cloth or squeegee to prevent moisture buildup. If you want tips on tackling stubborn stains and keeping your shower fresh longer, there’s more to explore.
Gather the Necessary Cleaning Supplies
Before you begin scrubbing your shower walls, make sure you gather all the necessary cleaning supplies. You’ll need a good-quality scrub brush or sponge, preferably one with a handle to keep your hands dry.
Grab a spray bottle filled with a bathroom cleaner or a homemade mixture of vinegar and water for tackling soap scum and mildew. Don’t forget rubber gloves to protect your skin from harsh chemicals.
A microfiber cloth or old towels will help you wipe down and dry the walls afterward. If you have tough stains, consider a paste made from baking soda and water.
Having these supplies ready ensures you won’t have to stop mid-cleaning, making the process more efficient and effective.
Prepare Your Shower Walls for Cleaning
While you gather your supplies, start by removing any personal items from the shower walls and shelves to give yourself clear access.
Next, rinse the shower walls with warm water to loosen dirt and soap scum.
Use a soft cloth or sponge to wipe down surfaces gently, removing any loose debris.
Check for mold or mildew spots, and if you see any, make a note to give those areas extra attention during cleaning.
Ensure good ventilation by opening a window or turning on the exhaust fan to help with drying and reduce moisture buildup.
Finally, put on gloves to protect your hands and prepare to apply your chosen cleaning solution, ensuring the walls are ready for an effective and thorough clean.
Choose the Right Cleaning Solution
Since different shower wall materials react uniquely to cleaning agents, you’ll want to pick a solution that’s effective yet safe for your surfaces.
For tile or ceramic walls, a mild detergent or a mix of vinegar and water usually works well without damaging grout.
If your shower walls are made of natural stone like marble or granite, avoid acidic cleaners; instead, use a pH-neutral cleaner designed for stone to prevent etching or dullness.
For fiberglass or acrylic walls, opt for non-abrasive, gentle cleaners to avoid scratching.
Always check the product label and test the cleaner on a small, inconspicuous area first to ensure it won’t harm your walls.
Choosing the right solution helps you clean effectively while preserving your shower’s finish.
Apply the Cleaner to the Walls
Once you’ve selected the right cleaner, apply it evenly across your shower walls using a sponge, cloth, or spray bottle. Make sure to cover all areas, especially corners and grout lines where soap scum and mildew tend to build up.
If you’re using a spray bottle, hold it about 6 to 8 inches away to avoid drips and ensure an even mist. For thicker cleaners, a sponge or cloth might give you better control.
Work from the top down to prevent cleaner from dripping onto areas you’ve already treated. Let the solution sit for the time recommended on the product label to break down grime effectively.
Avoid rushing this step—you’ll get much better results when the cleaner has time to work.
Scrub the Walls Effectively
After letting the cleaner sit, it’s time to scrub the walls to lift away soap scum, mildew, and grime. Grab a soft-bristled brush or a non-abrasive sponge to avoid damaging your shower surface. Start at the top and work your way down, focusing on areas with visible buildup or mold.
Use circular motions and apply steady pressure, but don’t scrub too hard. Pay special attention to grout lines and corners where dirt tends to accumulate. If you encounter stubborn spots, add a bit more cleaner and let it sit briefly before scrubbing again.
Keep your movements consistent to ensure thorough cleaning. Once you’ve scrubbed every inch, you’ll see the grime loosening and your shower walls looking refreshed and cleaner.
Rinse and Dry the Shower Walls
How do you make sure all the cleaner and loosened grime are completely removed? Start by rinsing the shower walls thoroughly with warm water. Use a handheld showerhead if you have one, or pour water from a large cup or bucket. Move systematically from top to bottom to prevent dirty water from dripping onto cleaned areas.
After rinsing, grab a clean microfiber cloth or squeegee and carefully dry the walls. This helps prevent water spots and mold growth. Focus on corners and grout lines where moisture tends to linger. Drying also leaves your shower walls looking polished and fresh.
Taking these simple steps ensures your shower stays clean longer and reduces the effort needed for your next deep clean.
Remove Tough Stains and Mildew
Although regular cleaning keeps most grime at bay, tough stains and mildew can still build up on your shower walls over time.
To tackle them, mix equal parts white vinegar and water in a spray bottle. Spray the solution generously on the stained or mildewed areas and let it sit for 10-15 minutes.
Then, scrub with a soft-bristle brush or sponge to loosen the buildup.
For stubborn mildew, sprinkle baking soda on the surface before spraying the vinegar solution; the fizz helps lift grime.
Rinse thoroughly with warm water to remove residue.
Avoid harsh chemicals that can damage your walls.
Repeat the process if necessary, and always wear gloves to protect your skin.
This method effectively removes tough stains and mildew, restoring your shower walls to a cleaner state.
Maintain Clean Shower Walls Regularly
To keep your shower walls looking fresh and prevent buildup, you should clean them regularly. Make it a habit to wipe down the walls with a squeegee or microfiber cloth after each shower. This simple step removes excess moisture and reduces soap scum and mildew growth.
Once a week, spray a gentle cleaner or a mixture of vinegar and water on the walls, let it sit for a few minutes, then rinse thoroughly. Don’t forget to dry the walls afterward to avoid water spots.
Regular maintenance not only keeps your shower looking spotless but also extends the life of your grout and tiles. By staying consistent, you’ll save time and effort compared to tackling heavy grime later on.
Frequently Asked Questions
Can Vinegar Damage Natural Stone Shower Walls?
Yes, vinegar can damage natural stone shower walls because its acidity may etch or dull the surface. You shouldn’t use vinegar; instead, choose pH-neutral cleaners specifically designed for natural stone to keep it safe and shiny.
How Often Should Shower Curtains Be Cleaned?
You should clean your shower curtains every month to prevent mold and mildew buildup. If you notice stains or smell, don’t wait—wash them sooner. Regular cleaning keeps your bathroom fresh and healthy.
Are Steam Cleaners Safe for Shower Walls?
Yes, steam cleaners are safe for most shower walls. They’ll effectively remove grime without harsh chemicals. Just avoid using them on delicate materials like unsealed natural stone to prevent damage. Always test a small area first.
What Causes Permanent Discoloration on Shower Tiles?
Permanent discoloration on shower tiles happens when hard water stains, mold, mildew, or harsh chemicals eat into the surface. If you don’t clean them quickly, minerals and grime can cause lasting damage and stubborn stains.
Can Mold Spread Behind Shower Walls?
Yes, mold can spread behind shower walls if moisture gets trapped. You’ll want to address leaks and improve ventilation quickly to prevent hidden mold growth that can damage your walls and affect your home’s air quality.
Conclusion
Now that you know how to clean your shower walls effectively, keeping them spotless will be much easier. Just gather your supplies, choose the right cleaner, and scrub away grime regularly to prevent buildup. Don’t forget to tackle tough stains and mildew promptly to maintain a fresh, inviting shower space. With consistent care, your shower walls will stay clean and sparkling, making your bathroom feel more comfortable and hygienic every day.