Hot Water Leaking From Shower Faucet? [Solved]
Shower leaks are a costly problem. It can be very annoying too. But the thing is, in general, showers or faucets leak cold water. So, what explains hot water leaking from shower faucet?
Hot water usually leaks from the shower faucet for worn-out seals and gaskets. Other possible causes include a faulty shower faucet cartridge, clogged parts, and issues with the diverter valve.
Should you call a professional plumber right when you face this issue? Not really! There are some simple fixes that you can implement to make the leak disappear. Keep on reading to learn all about those fixes.
Why Is My Hot Water Shower Faucet Dripping
As mentioned earlier, hot water leaking from the shower head is generally initiated by a couple of factors. To give you a better idea, here’s a description of each –
1. Worn-out Gaskets or Seals
Over time, the O-rings, gaskets, or seals within the shower system can wear out. It happens naturally due to friction. And when they are worn, the shower faucet fails to retain a proper seal, making the water seep out.
2. Mineral Deposits
Does your water supply offer hard water? In that case, there’s a high chance that you are dealing with mineral deposits. These sediments can settle on the parts and eventually clog the pathway. That will result in a leak.
3. Problems with the Cartridge
The cartridge within the shower faucet is basically a valve that controls the amount of hot and cold water flowing through the fixture. Over time, the small parts within the cartridge can wear out, which can make the faucet leak out hot water.
4. Diverter Issues
The diverter is generally to blame when the hot tap does not work or the water comes out of the faucet while showering. But a faulty diverter can also cause hot water to leak out of the shower faucet.
How to Fix a Leaky Shower Faucet
So, there are some simple troubleshooting steps that you can follow to stop the shower faucet from leaking hot water. They are –

1. Turn off the Water Supply
You should close the valve of the shower faucet. Turn the main valve off if your bathroom does not have a dedicated shut-off valve for the shower faucet.
2. Cover the Drain
You will need to disassemble the shower faucet in the next steps. For that reason, it’s better to cover the drain with a towel. This is another safety measure that will make sure you do not lose any small parts.
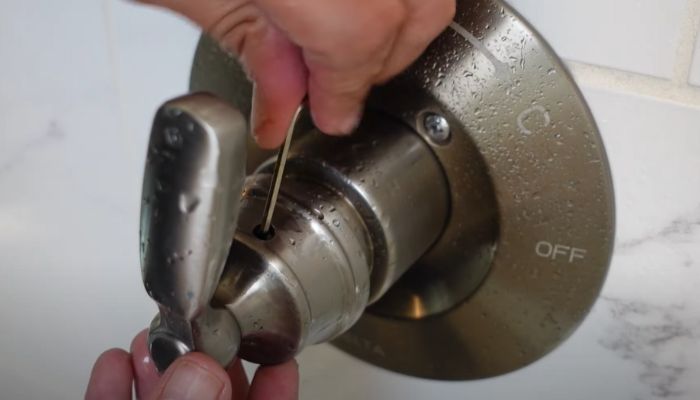
3. Remove the Handle
With all the precautionary measures out of the way, it would be time to work with the shower faucet. Get yourself a falt-head screwdriver or something with a sharp edge. Use it to pry the cover from the handle.
When the cover is off, you should see a screw or a nut underneath it. You will either require a screwdriver or a wrench to get it out. The handle should come right off afterward.
4. Pull the Faucet Cartridge or Metal Stem Out
Depending on your setup, a decorative faceplate can be beneath the handle. You should grab it and rotate it counterclockwise. With it out, check whether you can see a nut at the bottom of the metal stem.
Loosen that with a pair of needle-nose pliers. Then, grab the cartridge and pull it out. If the cartridge appears to be stuck, you should spray some WD-40 into it. Alternatively, you can use a cartridge puller.
Do you have a faucet shower with two or three handles? In that case, instead of cartridges, there will be metal stems under each handle.
Get a deep socket wrench and screw the valve nut that’s at the bottom of the stem. Once the screw is loose, you can remove the system’s components.
5. See Whether the Components Require a Replacement
Inspect the components that you just have taken out. Here, you will be looking for –
If any of the parts appear to be damaged or worn out, you should get a replacement. Install the new parts and reinstall the shower faucet. Make sure that the placement of each is correct. Take the help of the installation manual if you have to.
But if the components seem in good shape, but there’s some visible mineral buildup, you should move to the next step.
6. Soak the Parts in White Vinegar
The easiest way to get the mineral deposits off the part is to soak them in white vinegar. Pour it into a bowl and leave the components inside. Vinegar will loosen up the sediments, making it easier for you to brush them off.
Once you have fully taken care of the buildup, you should put the parts back in place and reassemble the faucet. Open the shut-off valve and see whether the tap still leaks.
How Can I Prevent Hot Water Leaks in the Future?
If you do not want to face any leaks in the future, you should keep these tips in mind –
- Make sure that the faucet has proper installation. All the nuts and screws should have the right tightness.
- Monitor the pressure of the water system. It should be between 60 and 70 PSI. Anything higher will cause the faucets to leak.
- Install a water softener. It will take care of the mineral buildup and prevent the parts from getting clogged.
- Check the washers and the O-rings of the faucet after every 3-4 months. Whenever you find signs of wear and tears, replace them.
Final Words
So what explains hot water leaking from shower faucet again? Well, it could be due to broken or damaged seals and gaskets. It could also be for a faulty diverter or cartridge. For these cases, you will need replacement parts.
On the other hand, if the leak is due to mineral buildup within the parts, cleaning them with white vinegar would do the trick.
