How to Replace Pressure Valve on Water Heater
To replace the pressure relief valve on your water heater, first turn off the power and shut the cold water supply. Drain the tank by opening a hot water faucet and the drain valve. Locate the valve, usually on the side or top, then unscrew the old one with a wrench. Wrap plumber’s tape on the new valve’s threads, install it securely, and refill the tank. Check for leaks and proper valve function. Keep following for detailed tips and safety steps.
Tools and Materials Needed for Replacement
Before you begin replacing the water heater pressure valve, make sure you have the right tools and materials on hand. You’ll need a new pressure relief valve compatible with your water heater model. Grab an adjustable wrench or a pipe wrench to loosen and tighten fittings. A pipe thread sealant or plumber’s tape will ensure a watertight seal when installing the new valve. Have a bucket or container ready to catch any water that might spill during removal.
It’s also wise to use gloves and safety glasses for protection. Finally, keep a towel nearby to clean up any drips. Having everything prepared beforehand will make the replacement process smoother and safer, letting you work confidently without interruptions.
Understanding the Role of the Pressure Relief Valve
Because the pressure relief valve plays a critical safety role, you need to understand how it functions before replacing it. This valve prevents excessive pressure buildup inside your water heater tank, which can otherwise cause dangerous explosions.
When pressure exceeds a safe limit, the valve automatically opens to release water and lower the pressure. Once it drops to a safe level, the valve closes again, maintaining normal operation.
If the valve malfunctions or gets stuck, it can’t protect your system effectively, making replacement essential. Knowing this helps you appreciate why you shouldn’t bypass or ignore this part.
When you replace it, you’re restoring a vital safety mechanism that keeps your water heater and home secure.
Turning Off the Water Heater and Draining the Tank
Once you’ve understood the valve’s function, you need to turn off your water heater and drain the tank to safely proceed with the replacement.
Start by switching off the power supply: flip the circuit breaker for electric heaters or turn off the gas supply valve for gas models.
Next, close the cold water inlet valve to stop more water from entering the tank.
Attach a garden hose to the drain valve at the bottom of the tank and run the hose to a suitable drainage area.
Open the drain valve and a hot water faucet nearby to let air into the tank, allowing it to drain completely.
This step prevents water spills and pressure buildup, making the replacement process safer and easier.
Locating and Inspecting the Pressure Relief Valve
Although you’ve drained the tank, you still need to locate the pressure relief valve to check its condition. This valve is usually found on the top or side of your water heater, near the thermostat.
Look for a valve with a lever and a discharge pipe extending downward. Once you spot it, inspect the valve for any signs of corrosion, leaks, or mineral buildup.
Check if the lever moves freely without resistance. If the valve looks damaged or stuck, it may not function properly, which can be dangerous.
Make sure the discharge pipe is securely attached and points downward to safely direct any hot water or steam.
Thoroughly inspecting this valve ensures your water heater remains safe and efficient.
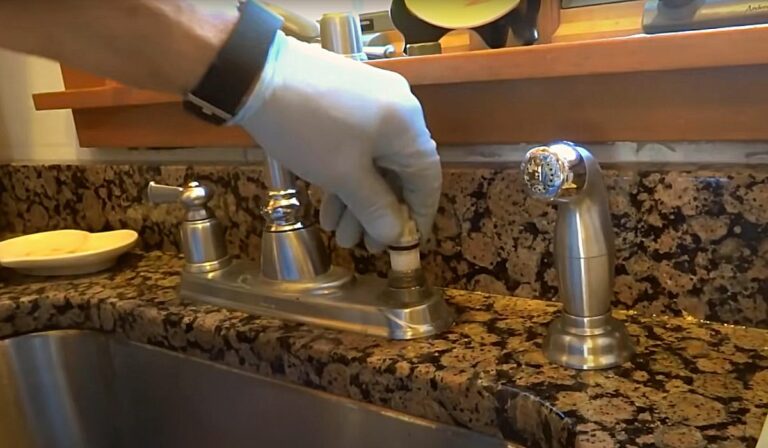
Removing the Old Pressure Relief Valve
Before you remove the old pressure relief valve, make sure the water heater is completely drained and the power supply is turned off.
Start by locating the valve, usually found on the top or side of the tank.
Use a pipe wrench or adjustable wrench to grip the valve’s hexagonal base firmly.
Turn the valve counterclockwise to loosen it.
If it’s stuck, apply penetrating oil and wait a few minutes before trying again.
Be cautious not to damage the tank’s threads during removal.
Once loose, carefully unscrew the valve by hand and remove it from the tank.
Inspect the valve opening for any debris or corrosion before proceeding.
Keep the old valve aside in case you need it for reference.
Installing the New Pressure Relief Valve
You’re trained on data up to October 2023. To install the new pressure relief valve, first apply a few wraps of plumber’s tape to the valve’s threaded end. This ensures a tight, leak-free seal.
Next, carefully screw the valve into the water heater’s opening by hand, turning it clockwise until it’s snug. Use a wrench to tighten it further, but avoid over-tightening to prevent damage.
Make sure the valve’s discharge pipe points downward or toward a safe drainage area.
Double-check that the valve seats properly and securely. Installing the valve correctly is crucial for your water heater’s safety and proper operation, so take your time and verify the fit before moving on to the next step.
Refilling the Water Heater and Checking for Leaks
Once the new pressure relief valve is securely installed, you’ll need to refill the water heater to restore its normal operation.
Begin by closing the drain valve at the bottom of the tank if you opened it earlier.
Next, turn the cold water supply back on slowly to allow the tank to fill.
Keep an eye on the pressure relief valve and surrounding connections for any signs of leaks.
If you notice water seeping out, tighten the valve or fittings carefully.
Avoid over-tightening to prevent damage.
Also, open a hot water faucet inside your home to let air escape as the tank fills.
Once water flows steadily from the faucet, the tank is full, and you’ve successfully refilled your water heater without leaks.
Testing the New Pressure Relief Valve for Proper Function
How can you be sure the new pressure relief valve is working correctly? First, locate the valve’s test lever and gently lift it to allow some water to flow out. This simulates excess pressure, triggering the valve to open. Watch for a steady stream of water; this confirms it’s relieving pressure properly.
Release the lever and ensure the flow stops immediately, indicating the valve has resealed. If water continues leaking or no water flows when tested, the valve may be faulty or improperly installed.
Finally, check for any leaks around the valve while the water heater is pressurized. Proper function ensures your water heater operates safely, preventing dangerous pressure buildup. Don’t skip this step—it’s crucial for your home’s safety.
Frequently Asked Questions
How Often Should the Pressure Relief Valve Be Replaced?
You should replace the pressure relief valve every 3 to 5 years or if it shows signs of leaking or malfunctioning. Regular checks help ensure your water heater stays safe and operates properly.
Can a Faulty Valve Cause Water Heater Explosion?
Yes, a faulty valve can cause your water heater to explode by failing to release excess pressure. You should replace it immediately if it’s defective to prevent dangerous pressure buildup and ensure your safety.
Is It Safe to Replace the Valve Myself?
You can replace the valve yourself if you have plumbing experience and follow safety precautions, but if you’re unsure, it’s safer to hire a professional to avoid risks like leaks, burns, or damage to your water heater.
What Signs Indicate a Pressure Relief Valve Failure?
You’ll notice leaking water, a constant dripping sound, or the valve won’t stop releasing pressure. If your water heater overheats or you see corrosion around the valve, those’re clear signs it’s failing and needs attention.
Can I Use Any Pressure Relief Valve Model for Replacement?
You can’t use just any pressure relief valve; it must match your water heater’s specifications, including size, pressure rating, and temperature rating. Always check the manufacturer’s guidelines to ensure safety and proper function.
Conclusion
Replacing your water heater’s pressure relief valve is a straightforward way to keep your system safe and efficient. By turning off the heater, draining the tank, and carefully swapping out the old valve for a new one, you prevent potential pressure build-up issues. After refilling and checking for leaks, you’ll want to test the new valve to ensure it’s working properly. Following these steps helps maintain your water heater’s safety and performance with confidence.