How to Remove Shower Head
To remove your shower head, first clear the area and turn off the water supply. Wrap a cloth around the shower head’s base to protect the finish, then use an adjustable wrench or pliers to turn it counterclockwise and loosen it. If it’s stuck, apply penetrating oil and wait before trying again. Once loose, unscrew it by hand and clean the shower arm. You can find out how to inspect and reinstall your shower head for a perfect fit next.
Tools Needed for Removing a Shower Head
Before you begin removing your shower head, gather the right tools to make the process smooth and efficient. You’ll need an adjustable wrench or a pair of pliers to loosen the connection between the shower arm and the head. Wrap the jaws of your tool with a cloth or tape to avoid scratching the fixture.
Have some plumber’s tape (Teflon tape) handy for reinstallation or future use. A cloth or rag will help you clean off any debris or water residue. If your shower head is stuck due to mineral buildup, a penetrating oil like WD-40 can help loosen it.
Having a bucket or towel nearby will catch any drips during removal. With these tools ready, you’ll be set to remove your shower head without hassle.
Preparing the Shower Area
Since water and debris can make the process messy, you’ll want to prepare the shower area carefully. Start by clearing the space around your shower to give yourself room to work comfortably.
Lay down an old towel or a plastic sheet on the tub floor to catch any drips or falling parts. Turn off the water supply to avoid accidental sprays.
Open the shower faucet briefly to release any remaining pressure in the pipes. Have a small bucket or bowl nearby to hold screws or washers you might remove.
Finally, keep a cloth or rag handy to wipe up any water spills immediately. Taking these steps will keep your bathroom clean and make the removal process smoother.
Step-by-Step Guide to Removing the Shower Head
With the shower area prepped and water supply off, you’re ready to remove the shower head. First, wrap a cloth around the shower head’s base to protect the finish.
Then, use an adjustable wrench or pliers to grip the cloth-covered base firmly. Turn the wrench counterclockwise to loosen the shower head.
If it’s stuck, apply a little penetrating oil, wait a few minutes, and try again.
Once loosened, unscrew the shower head by hand and carefully remove it from the shower arm. Set the shower head aside on a safe surface.
Avoid pulling or twisting too hard to prevent damaging the shower arm or pipe.
Now, you’ve successfully removed the shower head and can proceed with the next steps.
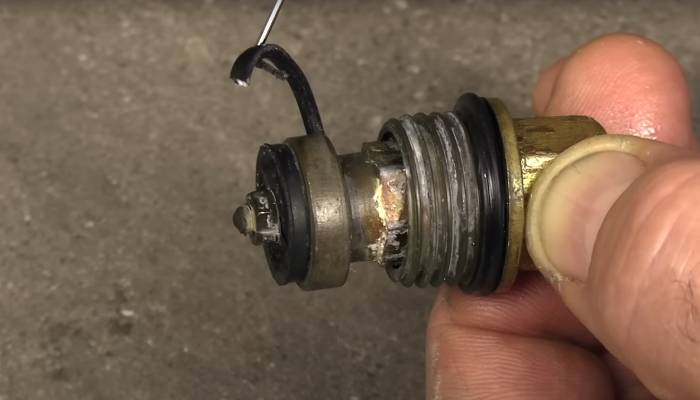
Cleaning and Inspecting the Shower Arm
Once you’ve removed the shower head, take a close look at the shower arm to check for any buildup or damage. Mineral deposits often accumulate around the threads, which can cause leaks or prevent a proper seal. Use a soft brush or an old toothbrush to scrub away any visible deposits gently.
If the buildup is stubborn, soak a cloth in white vinegar and wrap it around the arm for about 30 minutes before scrubbing again. After cleaning, inspect the shower arm for cracks, corrosion, or stripped threads. If you spot any damage, you might need to replace the arm to ensure a secure fit.
Finally, wipe the arm dry with a clean cloth to prevent further corrosion and prepare it for the next steps.
Installing a New Shower Head or Reattaching the Old One
Before installing your new shower head or reattaching the old one, make sure the shower arm is completely clean and dry.
Wrap plumber’s tape clockwise around the threads of the shower arm to ensure a watertight seal.
Screw the shower head onto the arm by hand, turning it clockwise until it’s snug. Avoid cross-threading by aligning the threads carefully before tightening.
Once it’s hand-tight, use an adjustable wrench or pliers to give it a final quarter turn for security, but don’t overtighten or you might damage the fittings.
After installation, turn on the water to check for leaks. If you see any drips, tighten the connection slightly more or reapply plumber’s tape if necessary.
Your shower head should now be securely installed and ready to use.
Frequently Asked Questions
Can I Remove a Shower Head Without Turning off the Water Supply?
You shouldn’t remove a shower head without turning off the water supply because water will spray everywhere. To avoid a mess or injury, turn off the main valve or shower valve before unscrewing the shower head.
How Do I Prevent Scratches on My Shower Head During Removal?
You can prevent scratches by wrapping your shower head with a soft cloth or painter’s tape before using a wrench. This cushioning protects the finish while you carefully loosen and remove the fixture without damage.
What if the Shower Head Is Stuck Due to Mineral Buildup?
If your shower head’s stuck from mineral buildup, soak it in vinegar for an hour to dissolve deposits. You can wrap a vinegar-soaked cloth around the joint, then gently twist with a wrench or pliers to loosen it.
Can Removing a Shower Head Affect My Water Pressure?
Yes, removing your shower head can affect water pressure. When you detach it, you might notice increased pressure from the exposed pipe, but once you install a new head, pressure depends on its design and any flow restrictors it has.
How Often Should I Replace My Shower Head?
You should replace your shower head every 6 to 12 months if you notice reduced water pressure, mineral buildup, or leaks. Regular replacement ensures better water flow and hygiene, keeping your shower experience refreshing and efficient.
Conclusion
Removing your shower head is simple when you have the right tools and follow the steps carefully. After loosening and detaching the shower head, take a moment to clean and inspect the shower arm for any damage or buildup. Whether you’re installing a new shower head or reattaching the old one, proper preparation ensures a secure fit and prevents leaks. With a little effort, you’ll have your shower working perfectly again in no time.