How to Install Outdoor Shower Plumbing
To install outdoor shower plumbing, first plan your layout near a water source and drainage area. Use durable, weather-resistant pipes and fittings, and shut off your main water supply before connecting lines. Securely install the shower valve and fixtures, ensuring watertight seals with Teflon tape. Grade the area for proper drainage and waterproof surfaces to protect your space. Follow these steps carefully, and you’ll soon uncover detailed tips to make your outdoor shower both functional and long-lasting.
Planning Your Outdoor Shower Plumbing Layout
Before you begin installing your outdoor shower plumbing, you’ll want to carefully plan the layout to ensure everything functions smoothly. Start by choosing a location with good drainage and easy access to your home’s water supply. Consider the distance between the water source and the shower to minimize pipe runs and reduce pressure loss.
Think about where you want the showerhead, mixer valve, and drainage point. Make sure your layout complies with local building codes and won’t interfere with underground utilities.
Sketch a simple diagram marking pipe routes, shut-off valves, and connection points. Planning now helps avoid costly changes later and ensures your outdoor shower performs reliably and safely.
Taking time on this step sets a strong foundation for the entire plumbing installation.
Selecting Materials and Tools Needed
When you choose materials and tools for your outdoor shower plumbing, opt for durable, weather-resistant options that can handle exposure to the elements. PVC and copper pipes are popular choices because they resist corrosion and are easy to work with.
For fittings, select brass or stainless steel to avoid rust. You’ll also need waterproof pipe cement or solder depending on your pipe type.
Essential tools include a pipe cutter, adjustable wrench, Teflon tape, and a drill with appropriate bits. Don’t forget safety gear like gloves and goggles.
Choosing the right valves and shower fixtures designed for outdoor use ensures longevity.
Having everything ready before you start will make installation smoother and prevent delays. Keep your materials organized and double-check specifications to match your planned layout.
Connecting Water Supply Lines
Although connecting water supply lines may seem straightforward, ensuring proper seals and secure fittings is crucial to prevent leaks and maintain water flow. Start by shutting off the main water supply before you begin.
Use Teflon tape or pipe thread sealant on threaded connections to create watertight seals. When joining pipes, make sure to clean and dry the ends thoroughly.
For PVC or CPVC pipes, use the correct primer and cement, applying them evenly. Push fittings firmly together, holding them in place for a few seconds to ensure a strong bond.
If you’re using copper pipes, solder the joints carefully, avoiding excessive heat that could damage fittings.
Finally, double-check all connections for tightness before turning the water back on to test for leaks.
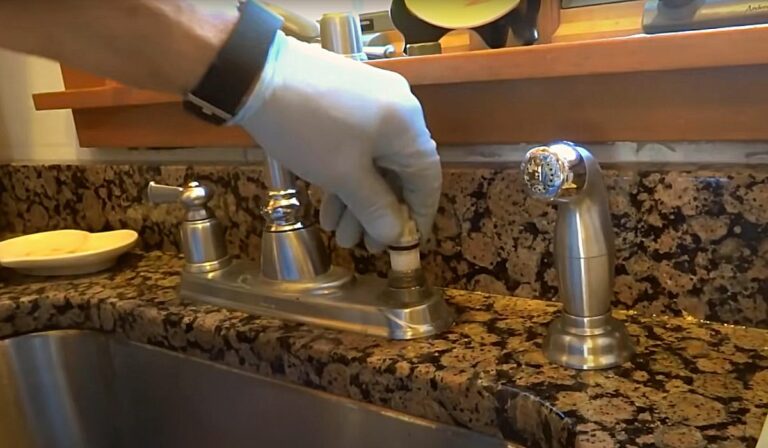
Installing the Shower Valve and Fixtures
After securing the water supply lines, you can move on to installing the shower valve and fixtures. First, mount the shower valve securely to a stable surface or framing, ensuring it’s level and easily accessible.
Connect the hot and cold water lines to the valve inlets, tightening each connection to prevent leaks. Next, attach the valve’s outlet to the shower riser pipe.
Once the valve is in place, install the showerhead and any additional fixtures, like a handheld sprayer, making sure all fittings are tight and properly sealed with plumber’s tape.
Finally, test the valve by turning on the water and checking for leaks or irregular flow. This step ensures your outdoor shower will function smoothly and reliably every time you use it.
Ensuring Proper Drainage and Waterproofing
Since your outdoor shower will be exposed to the elements, you need to ensure proper drainage and waterproofing to prevent water damage and pooling. Start by grading the shower area so water flows away from the foundation.
Install a drain system, like a French drain or a gravel bed, to direct water safely underground.
Use waterproof membranes or sealants on the shower floor and walls to keep moisture from seeping into surrounding structures.
Choose materials that resist water damage, such as treated wood or composite decking.
Regularly inspect seals and drainage to catch potential issues early.
Taking these steps guarantees your outdoor shower stays functional, safe, and free from water-related problems for years to come.
Frequently Asked Questions
Can I Use Solar-Heated Water for My Outdoor Shower?
Yes, you can use solar-heated water for your outdoor shower. Solar systems are eco-friendly and cost-effective, providing warm water by harnessing the sun’s energy. Just ensure proper installation for consistent water temperature and flow.
How Do I Winterize My Outdoor Shower Plumbing?
You’ll want to drain all water from your outdoor shower plumbing, shut off the water supply, and use compressed air to blow out remaining moisture. Then, insulate exposed pipes to prevent freezing and damage during winter.
What Are the Best Plants to Surround an Outdoor Shower?
You’ll want hardy, moisture-loving plants like ferns, ornamental grasses, and bamboo to create a lush, private feel. Adding fragrant herbs like lavender or rosemary enhances the experience while withstanding outdoor conditions beautifully.
Is It Legal to Install an Outdoor Shower in My Area?
You’ll need to check local building codes and zoning laws to see if outdoor showers are allowed. Contact your city or county office, as regulations vary, and you might require permits before installing one.
How Do I Prevent Insects From Nesting in the Shower Area?
You can prevent insects by sealing gaps, using insect-repellent plants nearby, and installing screens on drains. Regularly cleaning the shower area and avoiding standing water also keeps bugs away, ensuring a comfortable, pest-free outdoor shower experience.
Conclusion
By planning your layout carefully and choosing the right materials, you’ll make installing your outdoor shower plumbing much easier. Connect the water supply lines securely, and don’t forget to install the shower valve and fixtures correctly to avoid leaks. Ensuring proper drainage and waterproofing will keep your shower functional and prevent damage. With these steps, you’ll enjoy a refreshing outdoor shower that lasts for years. Just take your time and follow each step closely!