How To Make A Dresser Into A Bathroom Vanity
Transforming a dresser into a bathroom vanity is a smart, stylish way to add character and storage to your space. Not only does it save money compared to buying a new vanity, but it also lets you customize your bathroom with a piece that’s uniquely yours. Whether you’ve found the perfect vintage dresser or a sturdy piece with great bones, this project guides you step-by-step on turning it into a functional, water-resistant vanity that handles plumbing needs with ease. Let’s jump into how to select, prepare, and modify your dresser for a stunning bathroom upgrade.
Choosing The Right Dresser For Your Vanity Project
Materials And Style Considerations
Your journey begins by selecting a dresser that complements your bathroom’s style and will hold up well over time. Opt for solid wood pieces like oak, maple, or cherry, which tend to handle moisture better than particleboard or MDF. The dresser’s style should match or enhance your bathroom décor, whether that’s sleek modern lines or charming farmhouse appeal.
Sizing And Storage Needs
Measure the space where you plan to install your vanity carefully. The dresser should provide enough surface area to comfortably fit your sink and leave room for toiletries. Also, think storage: check drawer depth and height to ensure they can store your bathroom essentials effectively. Remember, you might lose some internal space due to plumbing modifications, so choose a dresser with ample capacity to accommodate this.
Preparing The Dresser For Bathroom Use
Cleaning And Stripping Old Finishes
Before you can work any magic, thoroughly clean your dresser. Remove dirt, grime, or any wax buildup using gentle soap and water. If the dresser has old varnish or paint, stripping off these finishes with a chemical stripper or sanding is crucial to ensure proper adhesion of waterproofing materials.
Repairing And Reinforcing The Structure
Bathrooms are humid environments, so inspect your dresser for any weak joints, cracks, or wobbly legs. Reinforce corners with wood glue and screws if necessary, and replace any damaged hardware. Strengthening the structure now will prevent future issues and give you a sturdy base for your sink and faucet.
Modifying The Dresser To Fit Plumbing
Measuring And Cutting Openings For Sink And Pipes
This is where precision counts. Measure your sink’s basin and plumbing dimensions carefully. Mark the areas on your dresser where you’ll need to cut out openings for the sink drain and water lines. Use a jigsaw or router to cut clean, smooth holes. It’s best to double-check measurements before cutting to avoid mistakes.
Ensuring Proper Ventilation And Drainage Access
Apart from the basic openings, consider creating vents or additional cutouts in the back or underside of the dresser. These allow for airflow to prevent moisture buildup and easy access for future plumbing repairs. Proper ventilation and accessibility can drastically extend the life of your vanity.
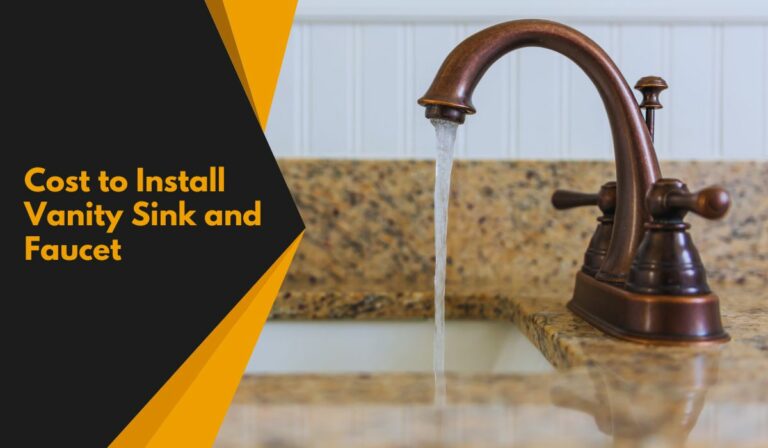
Installing The Sink And Faucet
Choosing A Compatible Sink Type
Selecting the right sink is crucial for seamless integration. Vessel sinks sit on top of the dresser and can be installed without major modifications. Drop-in or undermount sinks may require more extensive cutouts but offer a integrated look. Make sure the sink size matches your dresser’s top dimensions.
Attaching The Faucet And Plumbing Fixtures
Choose faucets that suit your sink style and bathroom needs. Follow manufacturer instructions for faucet installation, ensuring tight connections to avoid leaks. Once the faucet is ready, connect the plumbing fixtures, water supply lines, drainpipe, and P-trap, making sure everything fits neatly within the dresser’s modified space.
Finishing Touches And Waterproofing
Applying Waterproof Sealants And Paints
To protect your dresser vanity against bathroom humidity, apply a high-quality waterproof sealant, like marine varnish or polyurethane. Paints designed specifically for bathrooms help repel water and resist mildew. Apply multiple thin coats, sanding lightly between each for a smooth, durable finish.
Installing Hardware And Decorative Elements
Replace old drawer pulls or knobs with moisture-resistant hardware that matches your design aesthetic. Adding decorative trim or a backsplash can enhance appearance while protecting walls from water splashes. These finishing touches refine the overall look and function of your vanity.
Maintaining Your Dresser Vanity For Longevity
Cleaning And Care Tips For Bathroom Conditions
Your dresser vanity will thrive with regular attention. Wipe surfaces with a damp cloth and mild cleaner, avoid harsh chemicals that might break down finishes. Use coasters or trays to keep toiletries off direct wood surfaces and quickly clean up water spills.
Periodic Maintenance And Repairs
Inspect your vanity every few months for signs of wear, peeling sealant, or loose hardware. Address small repairs promptly, like tightening screws or reapplying sealant in worn areas, to prevent extensive damage and keep your bathroom centerpiece looking and working great for years.
Conclusion
Converting a dresser into a bathroom vanity is a rewarding DIY project that blends creativity with practicality. By carefully choosing your dresser, preparing and modifying it thoughtfully, and applying diligent finishing and maintenance, you create a customized vanity that’s both beautiful and built to last. This approach not only infuses personality into your bathroom but elevates its functionality, turning your space into something truly special.